
Create and set up your agent
Consent tab visibility: it still needs consent.manual or consent.api (plus See your brands and agents). A user with only See links can't reach the JOIN tile. If you want the JOIN link reachable on its own, the tab's visibility rule needs to change too, since the tab loads data that needs a consent gate.
Access
You do not need an RCS Studio account to create a brand or agent, edit its details, manage test devices or use the setup guide. You need one for the Build messaging experience → and Edit in RCS Studio links. Every feature here has a switch on the Settings page, on by default. If a switch is off, only people with an RCS Studio account and HubSpot super admins can use that feature. Manage your team in HubSpot lists what each switch controls. Connecting or disconnecting an inbox in the setup guide is limited to HubSpot super admins.
Your RCS Studio plan limits brands, agents and test devices. The Free plan allows one brand, one agent and 5 test devices. If you reach a limit, the app shows RCS Studio's reason. Launch and manage your agents shows how to change plans.
Create a brand and an agent
-
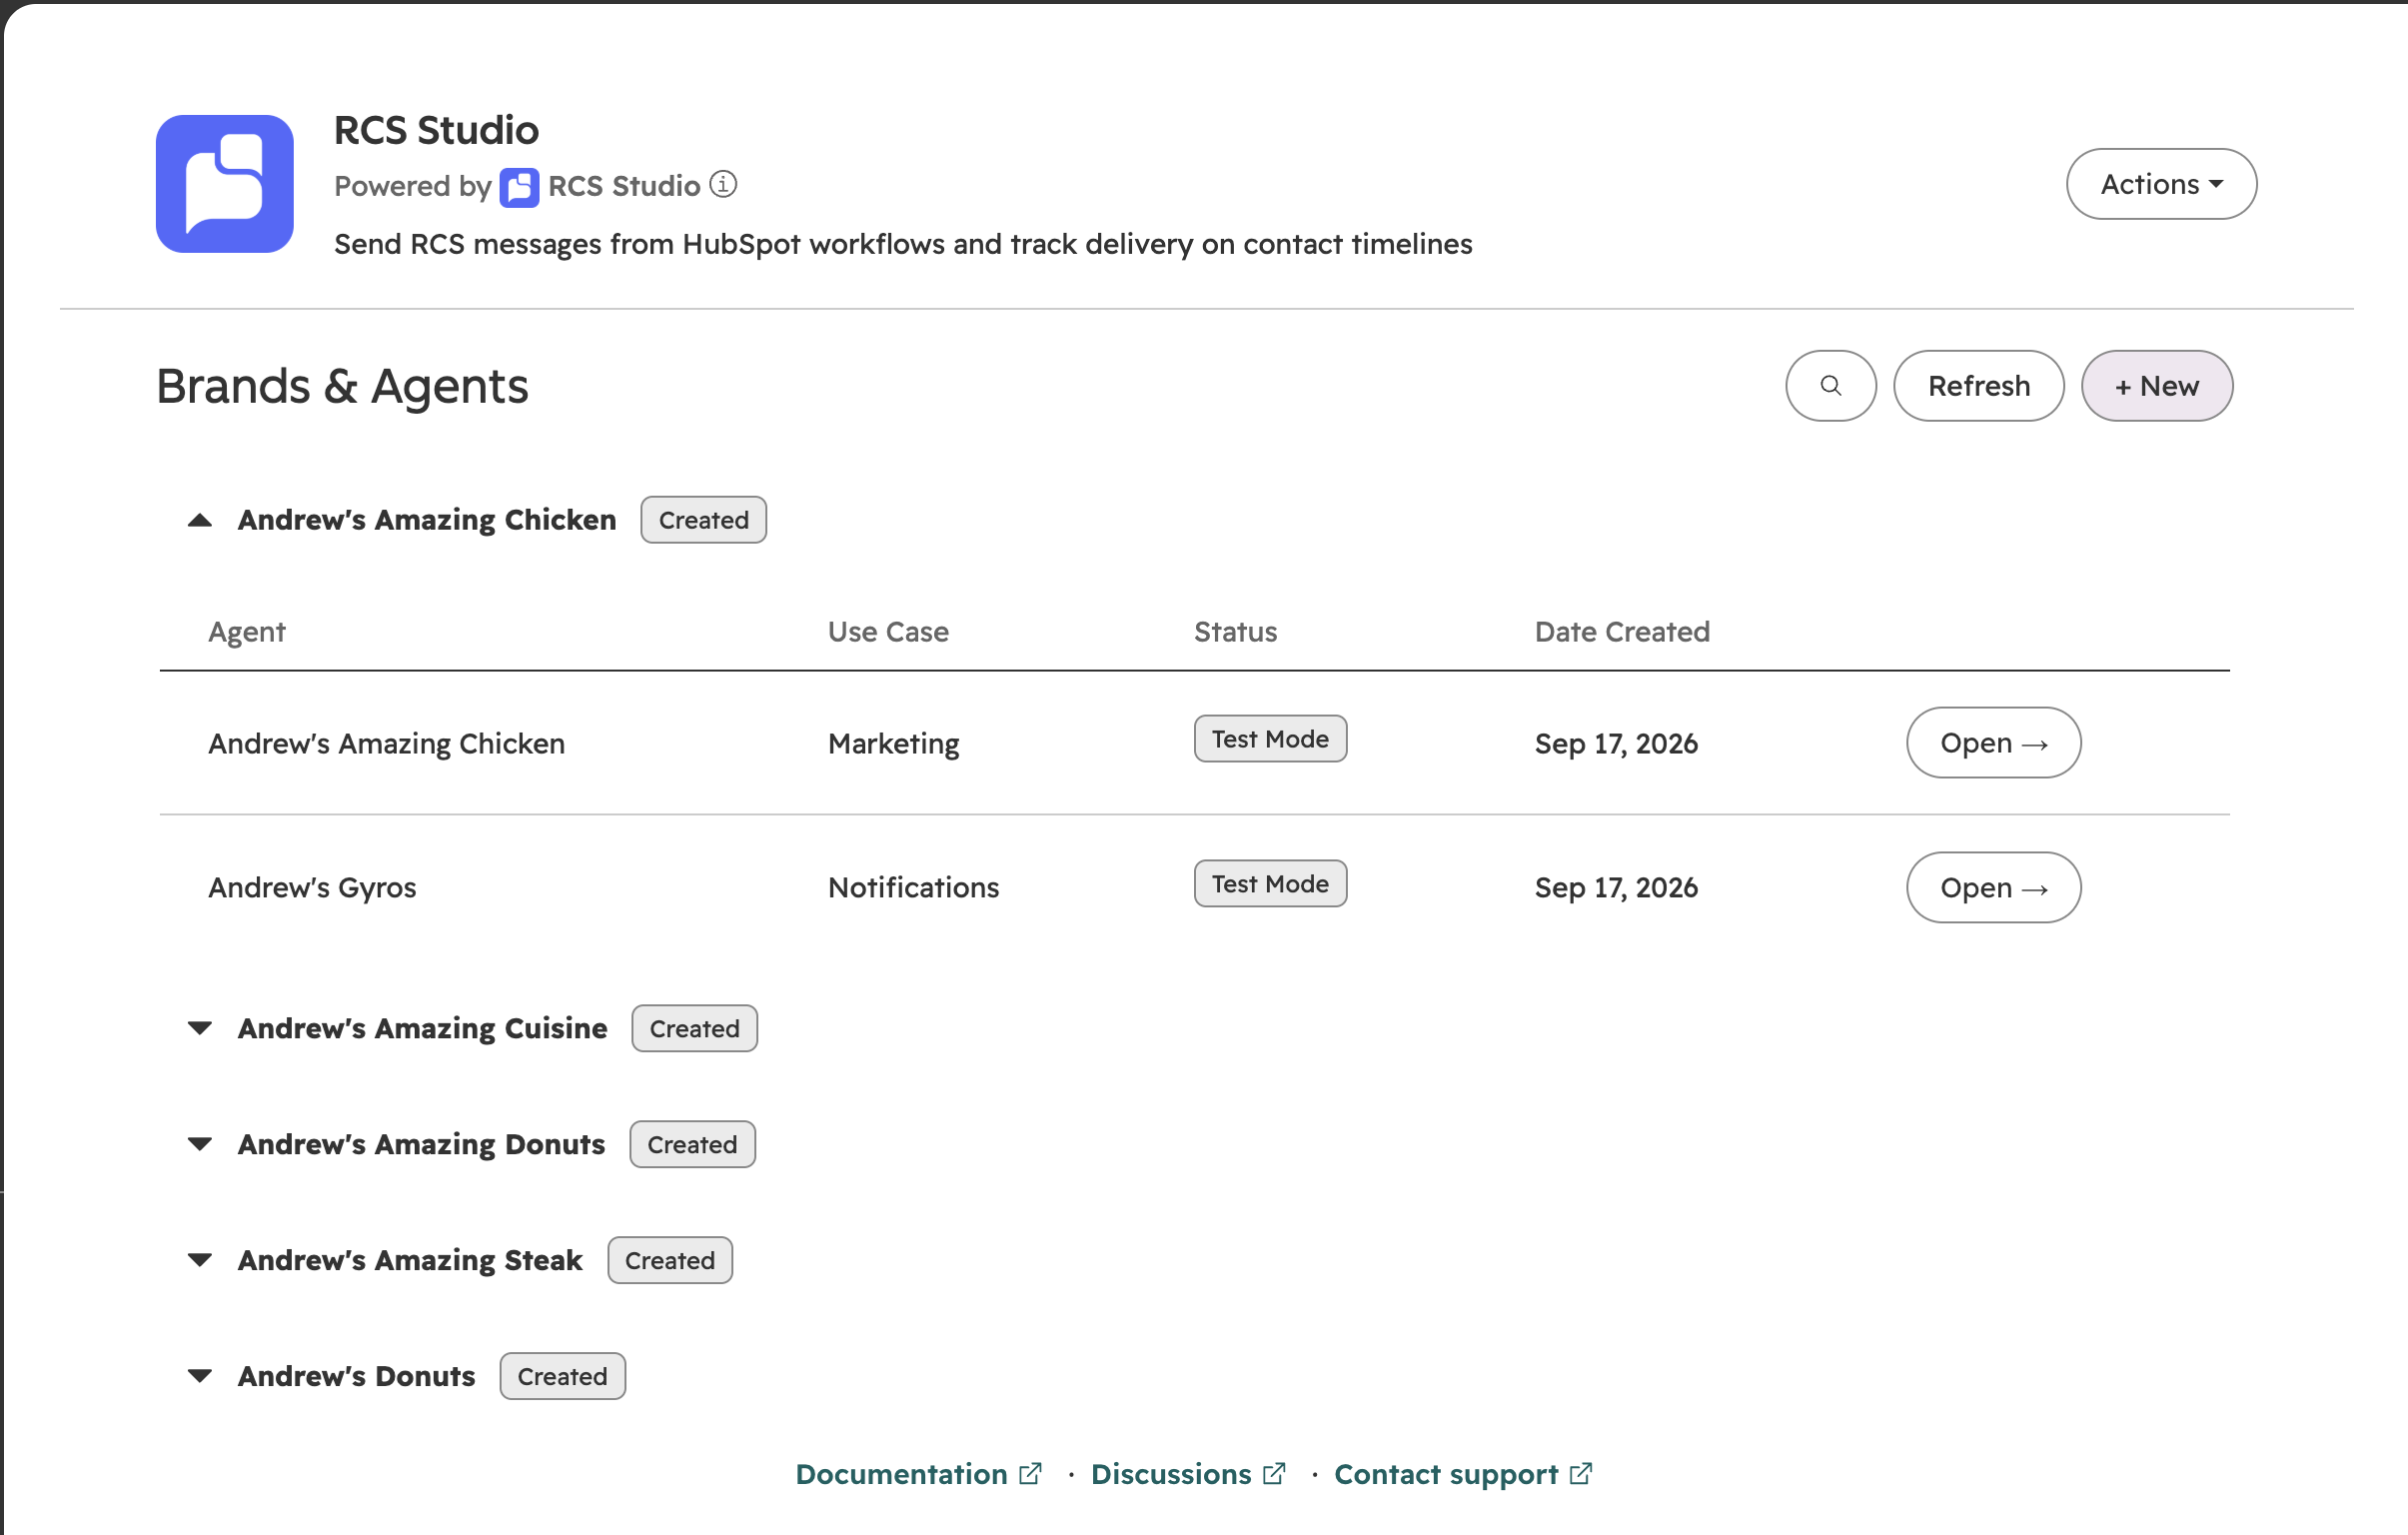
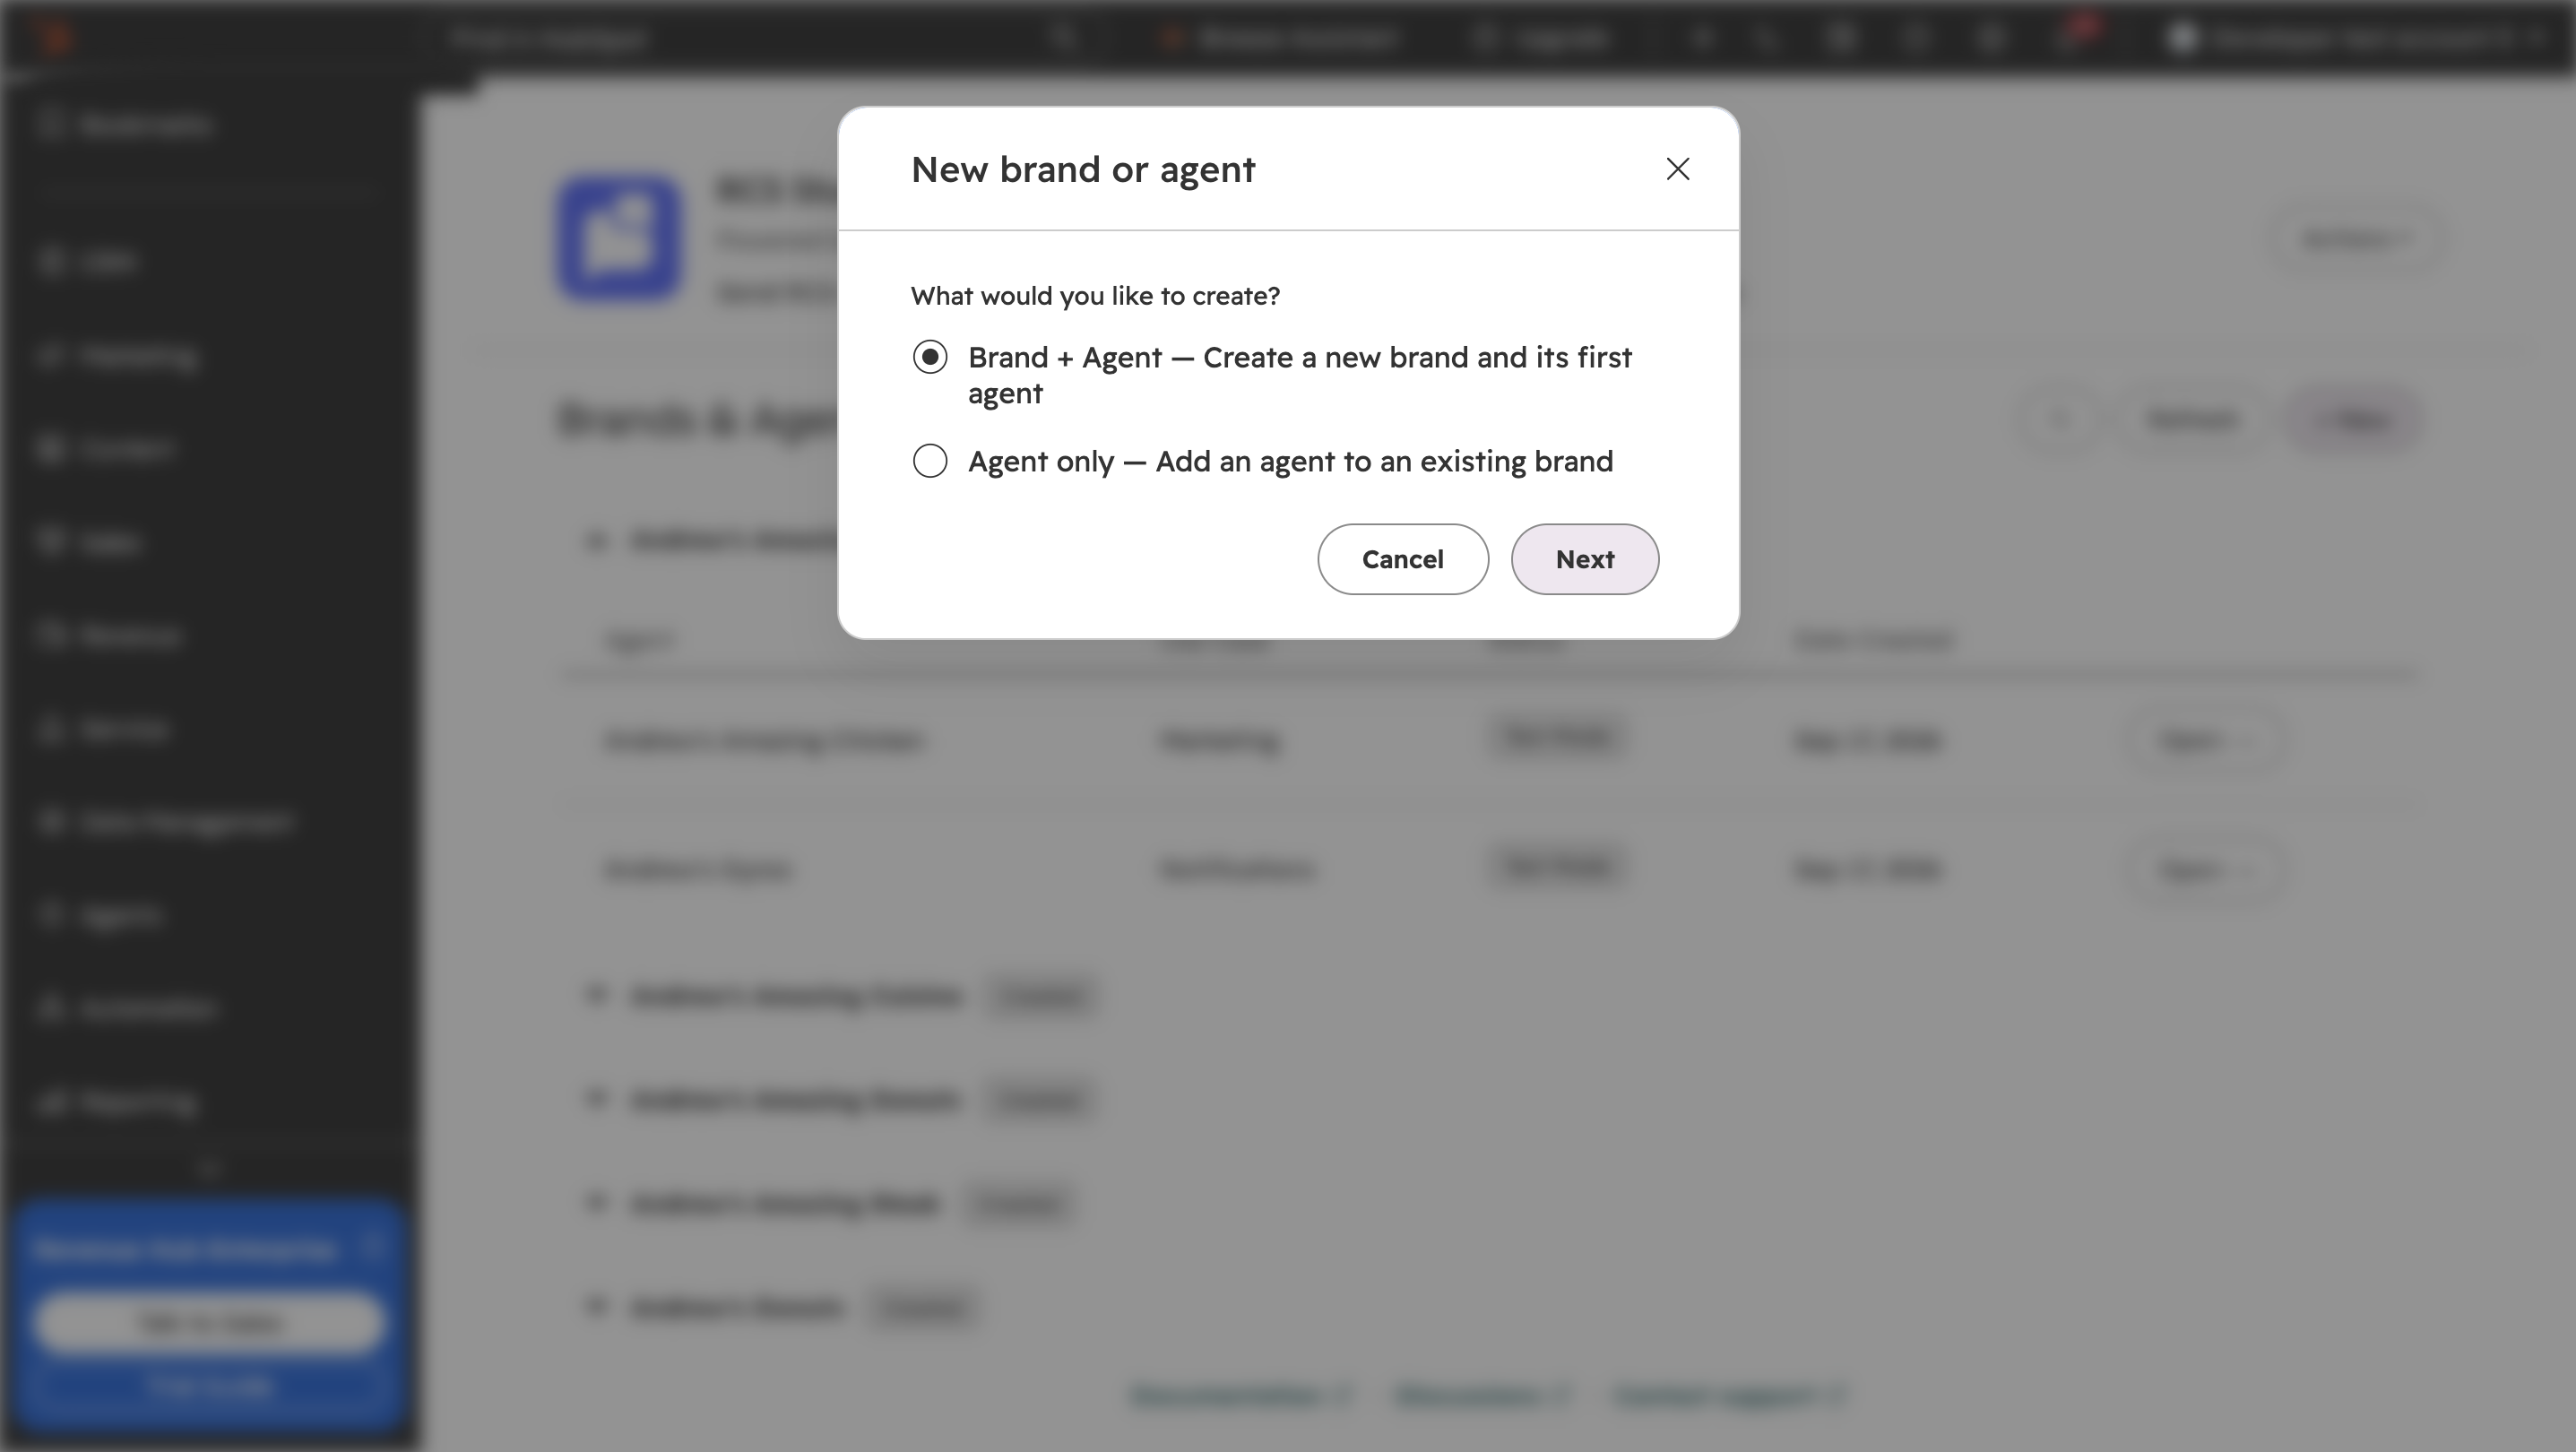
In HubSpot, open the app (Open and navigate the app shows both ways). On the Agents page, click + New. The New brand or agent window asks "What would you like to create?"
-
Choose Brand + Agent to create a new brand and its first agent, or Agent only to add an agent to a brand you already have. Agent only appears only when a brand exists. Click Next.
-
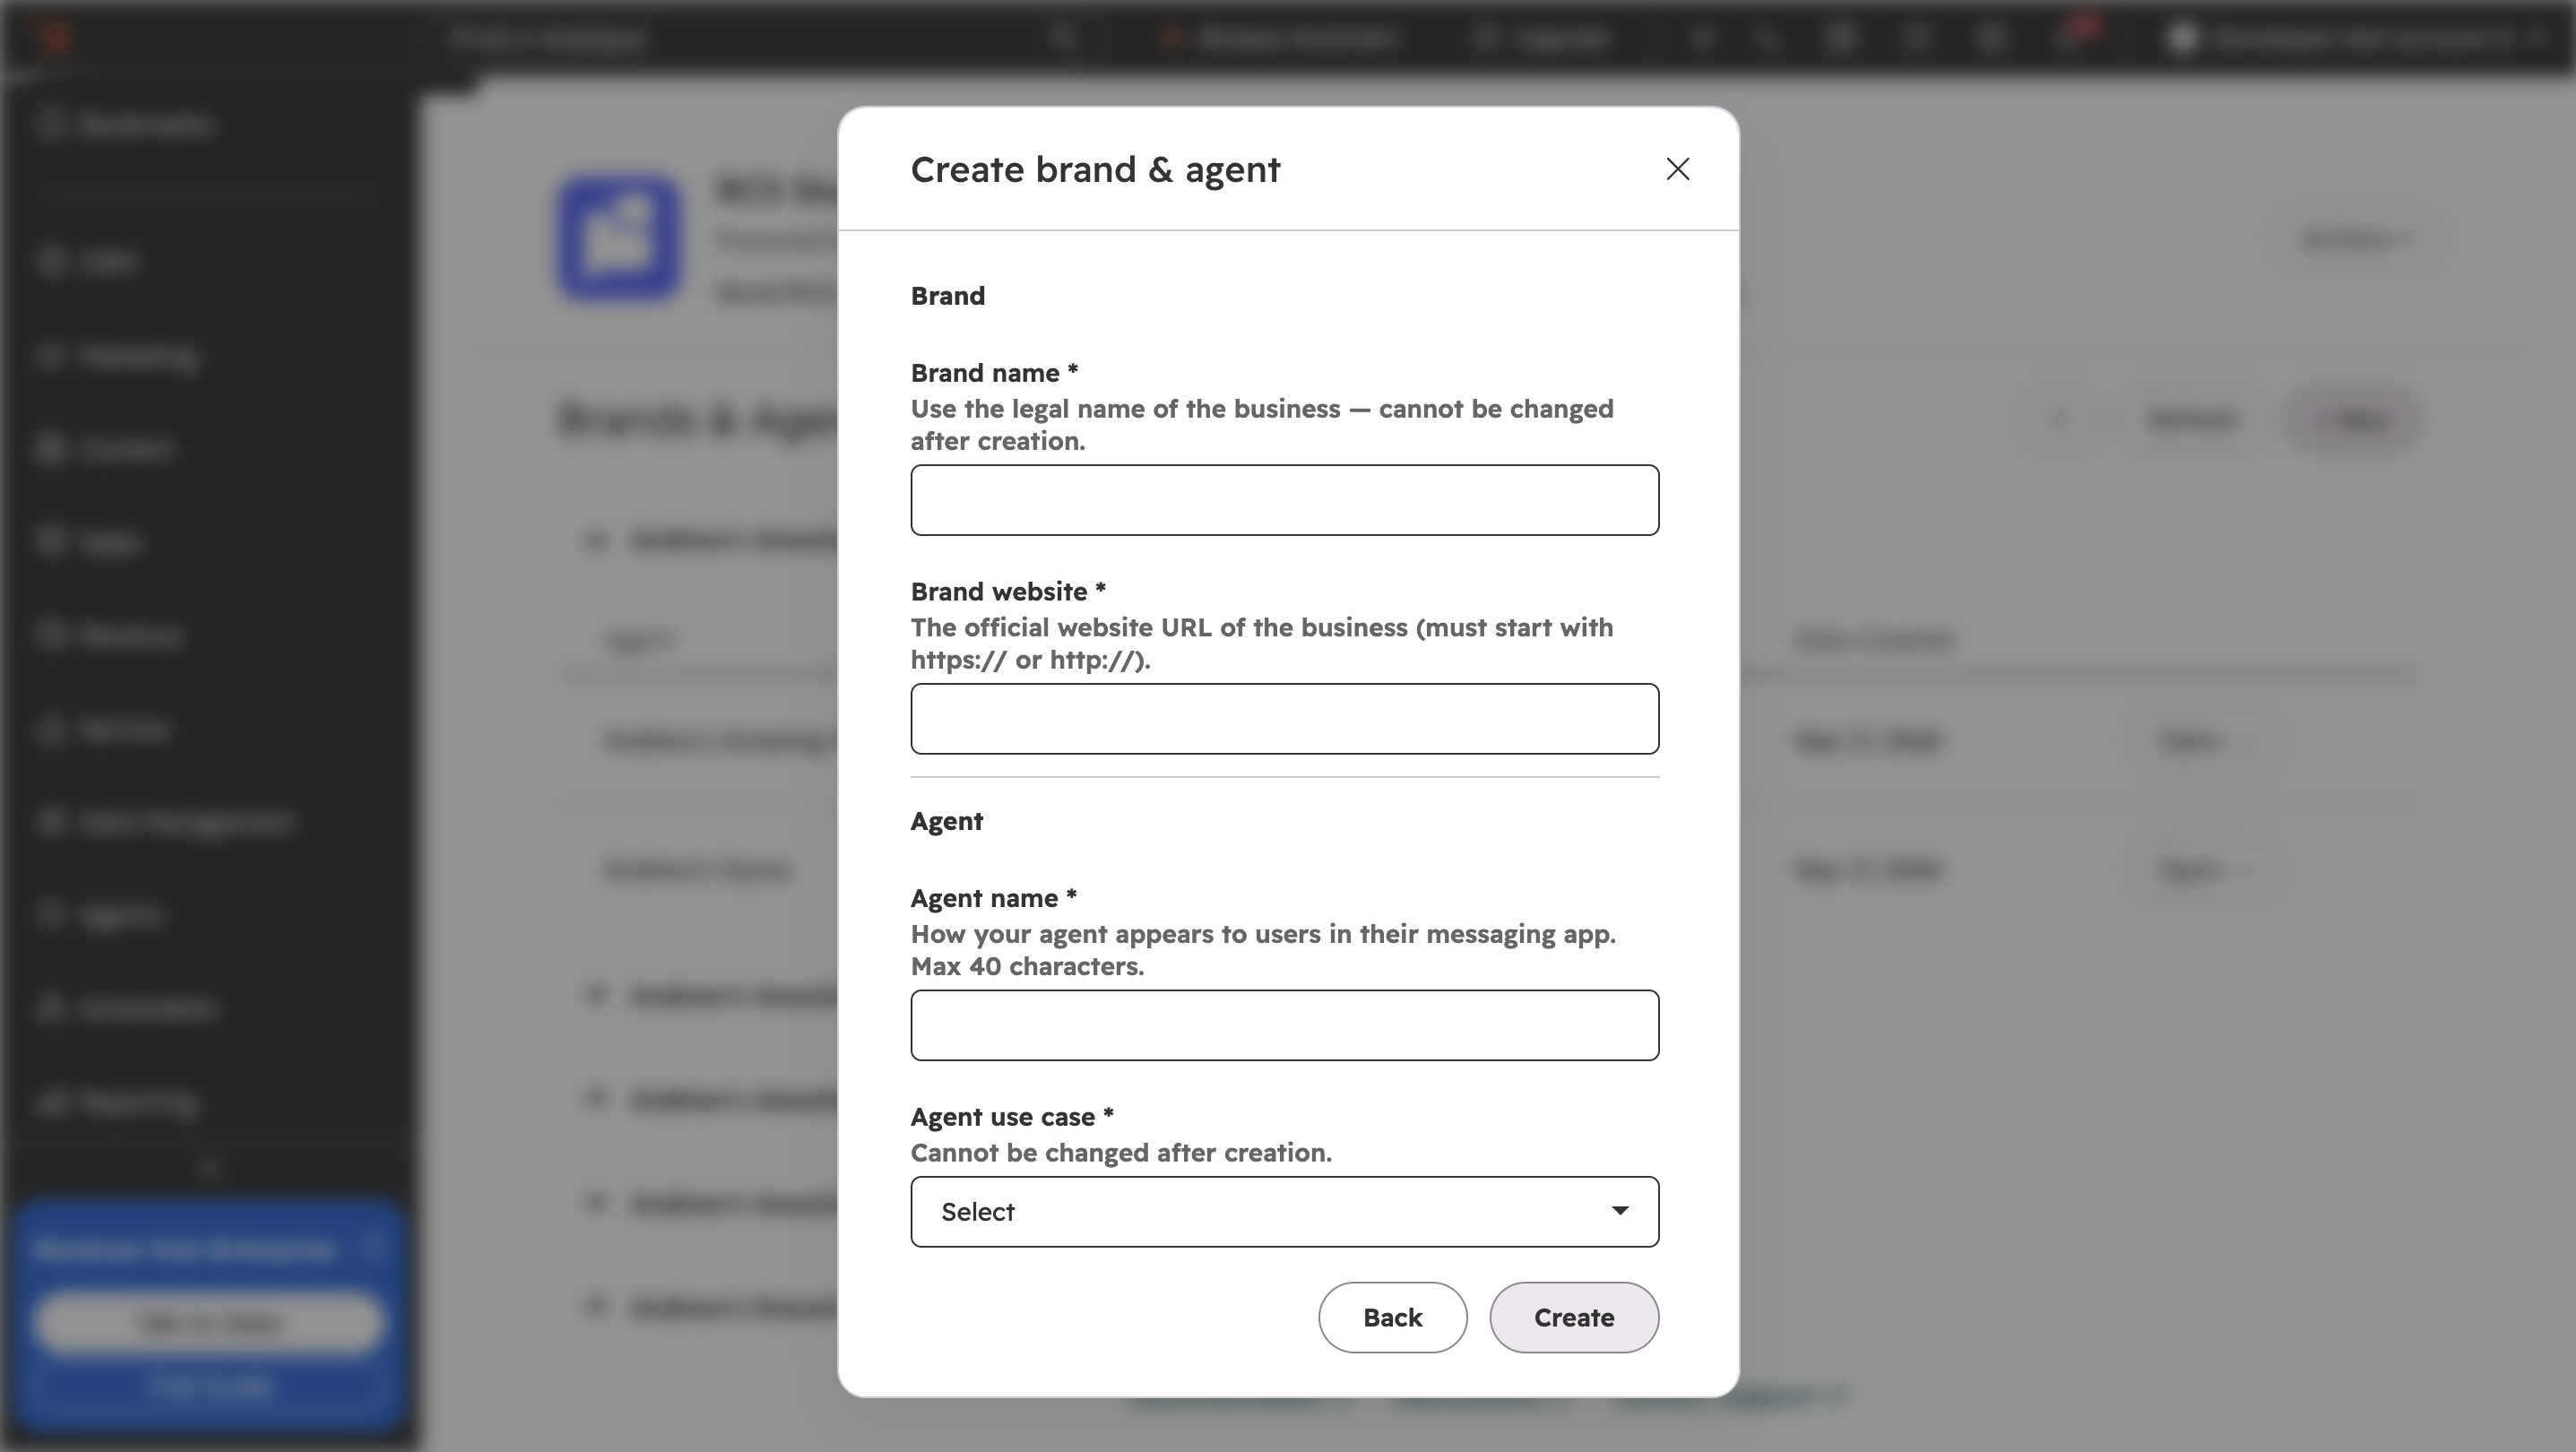
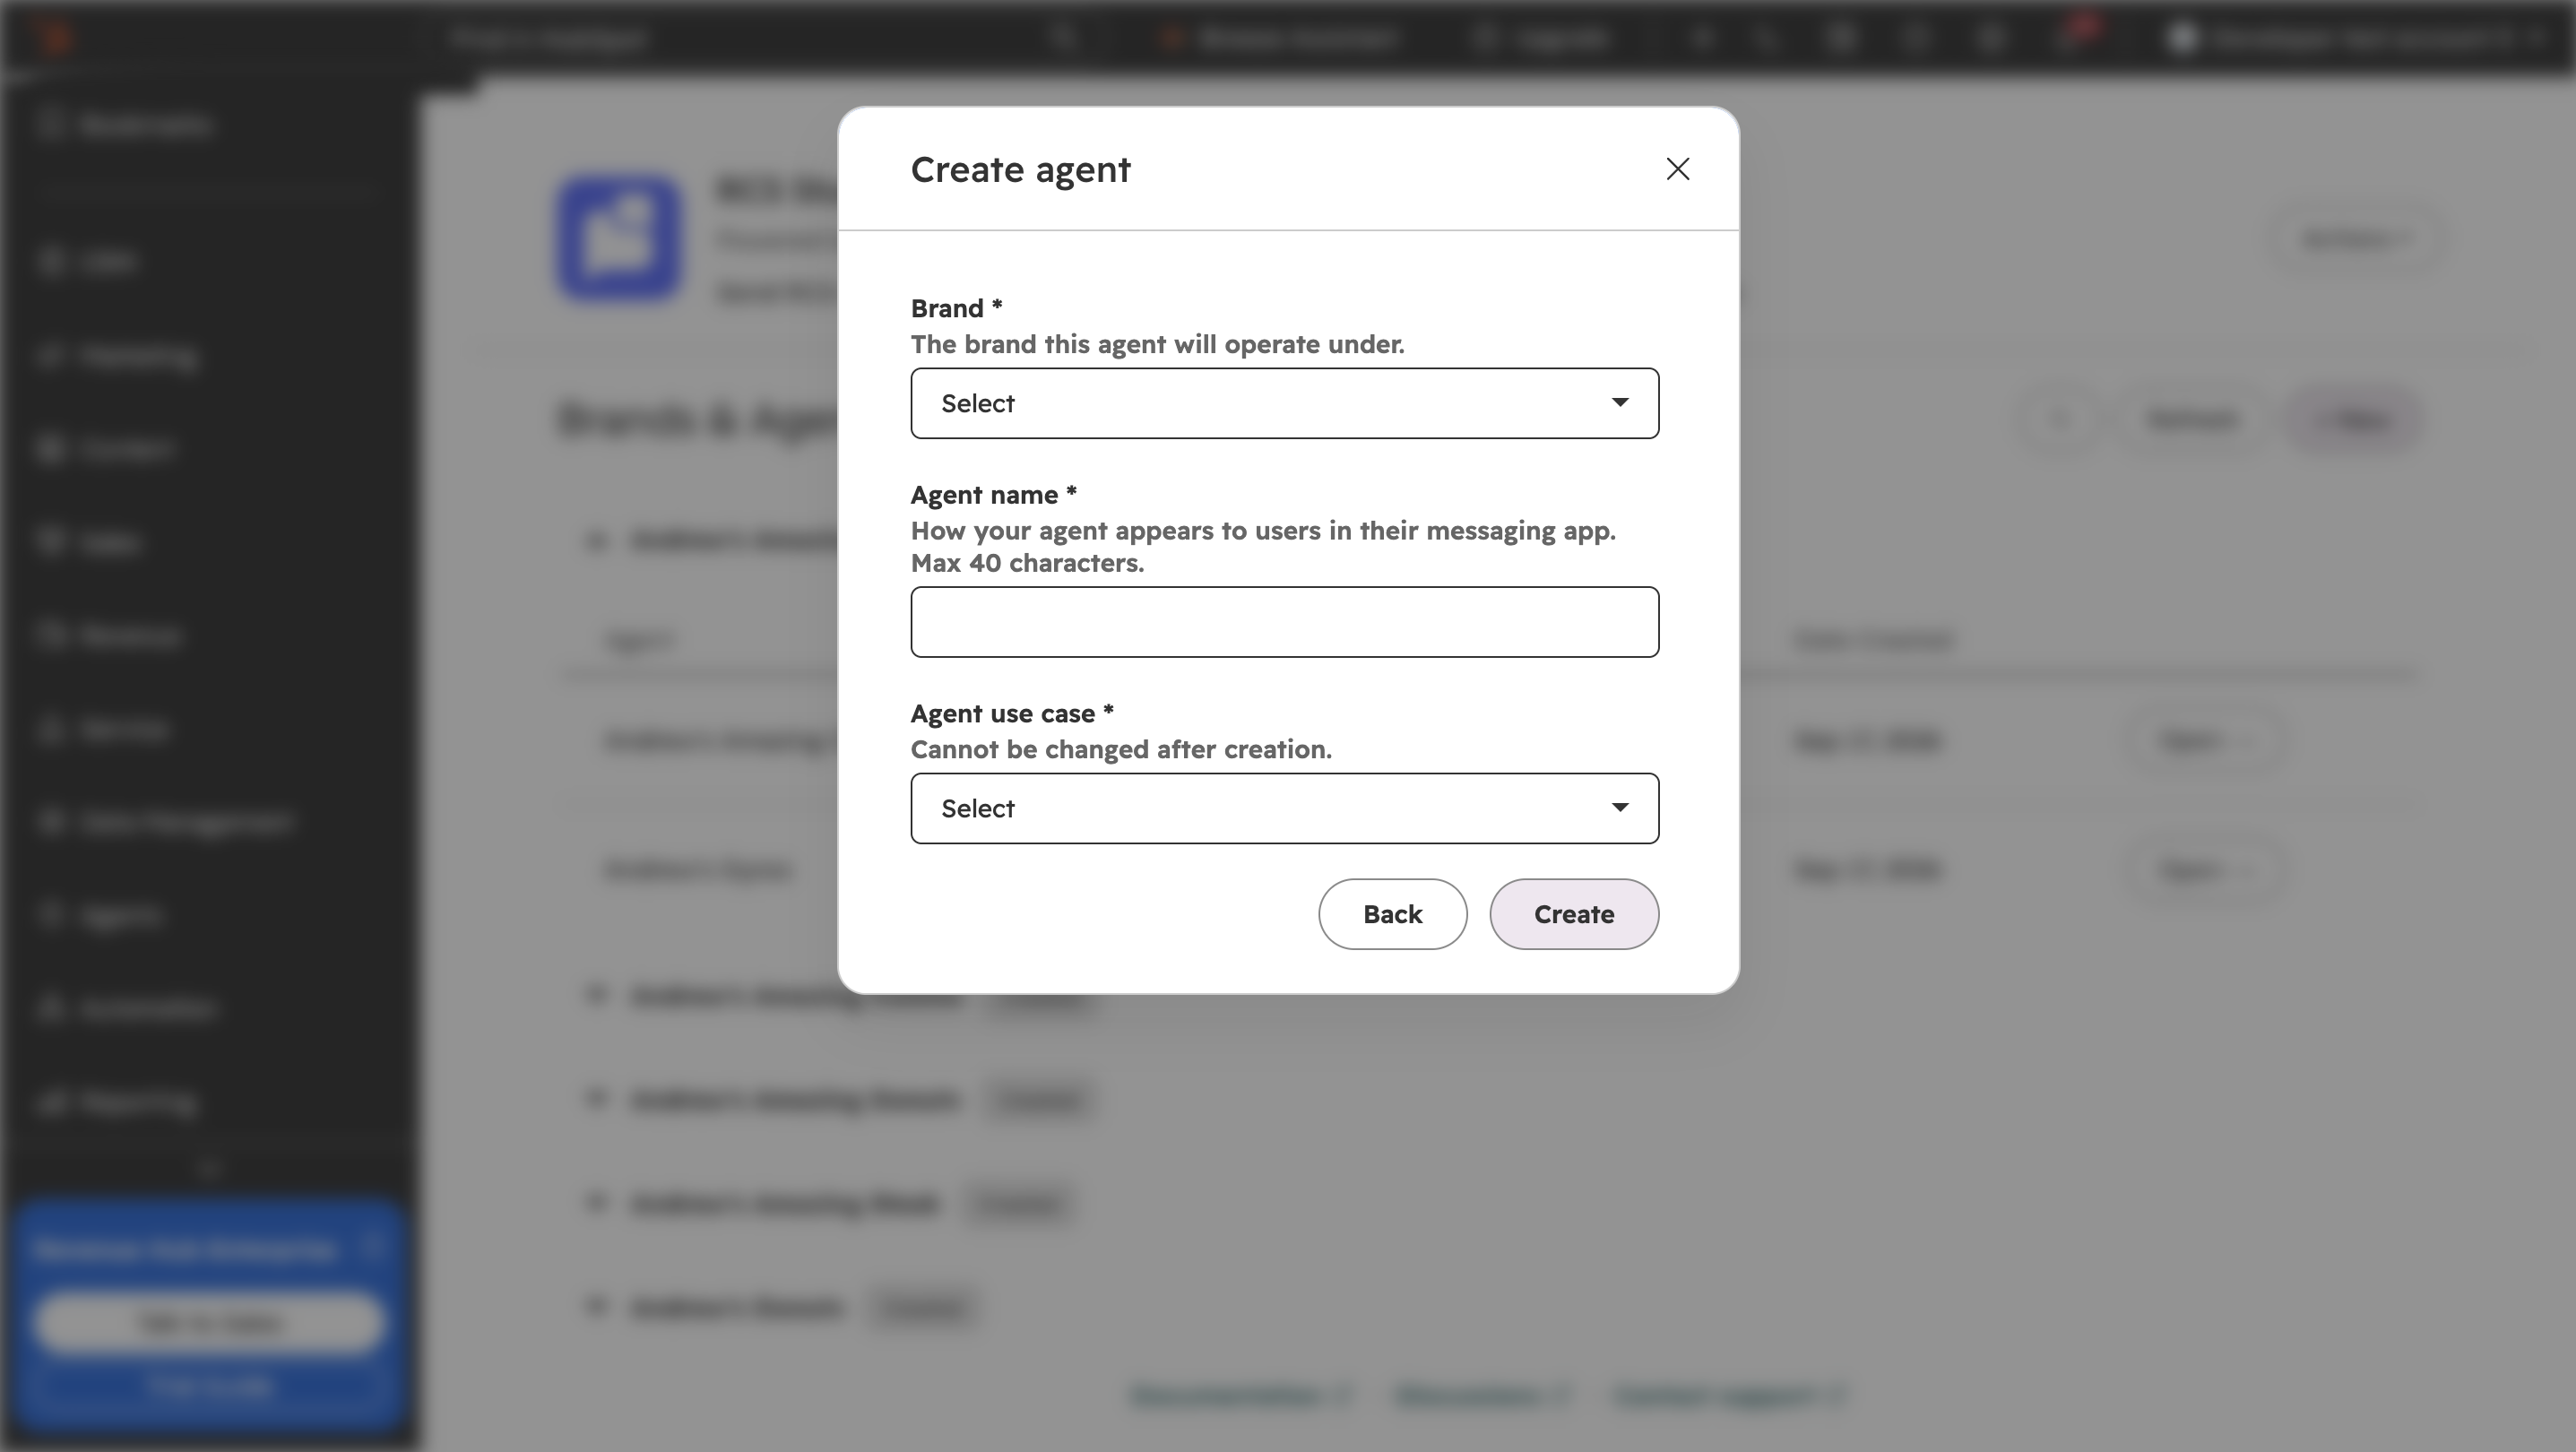
Fill in the form and click Create.
| Field | Rules |
|---|---|
| Brand name | The legal name of the business. Required, 100 characters at most. It cannot be changed after creation. |
| Brand website | Required. Must start with https:// or http://. |
| Brand (agent only) | Pick the brand the agent belongs to. |
| Agent name | How the agent appears in a contact's messaging app. Required, 40 characters at most. You can change it later. |
| Agent use case | Multi-use, Marketing, Notifications or Verification (OTP). It cannot be changed after creation. It decides the wording of the consent prompt: a Marketing agent's prompt uses marketing wording. |
Before it creates anything the form checks the fields and shows "Brand name is required", "Max 100 characters" (brand name), "Max 40 characters" (agent name) and "URL must start with https:// or http://" under the field.
The window closes as soon as you click Create, and creation continues in the background. A banner reads "Agent setup in progress" with "Your agent is being registered in Google's network. This usually takes a few minutes. The list will refresh automatically." The row shows a spinner instead of Open → until it is ready.
The Agents page
Agents are grouped by brand, and each brand heading shows the brand's status. Each row shows the agent, its use case, a status tag and the creation date. Click Open → to go to the agent. Refresh reloads the list, and the search box filters by name. An agent has the tabs Overview, Test Devices, Flows, Consent, Links and Settings; a tab you have no permission for is not shown. Open and navigate the app describes each tab.
Status labels
The tag on each agent and the Agent Status Progression on its Overview tab show where it is in Google's process. The steps are Agent Created, Test Mode, Launch Request, Approvals and Live. RCS Studio's agent status lifecycle covers the statuses in general.
| Tag | Stepper shows | Typical time | What is happening |
|---|---|---|---|
| Created | Test Mode, "In progress…" | ~5 minutes | "Your agent was just created!" The app is connecting the agent to Google's RCS network. |
| Setup Failed | Test Mode, "Failed" | "Something went wrong". Contact [email protected]. | |
| Test Mode (or Updating just after you save details) | Launch Request, "Action required" | ~1 hour | "Your agent is in test mode". See Test Mode and test devices. |
The times are the app's estimates. After Test Mode the tag moves through Under Review, Verified, Partially Live and Live; see Launch and manage your agents. In Test Mode the banner links to Build messaging experience →, which opens RCS Studio.
Agent details and brand settings
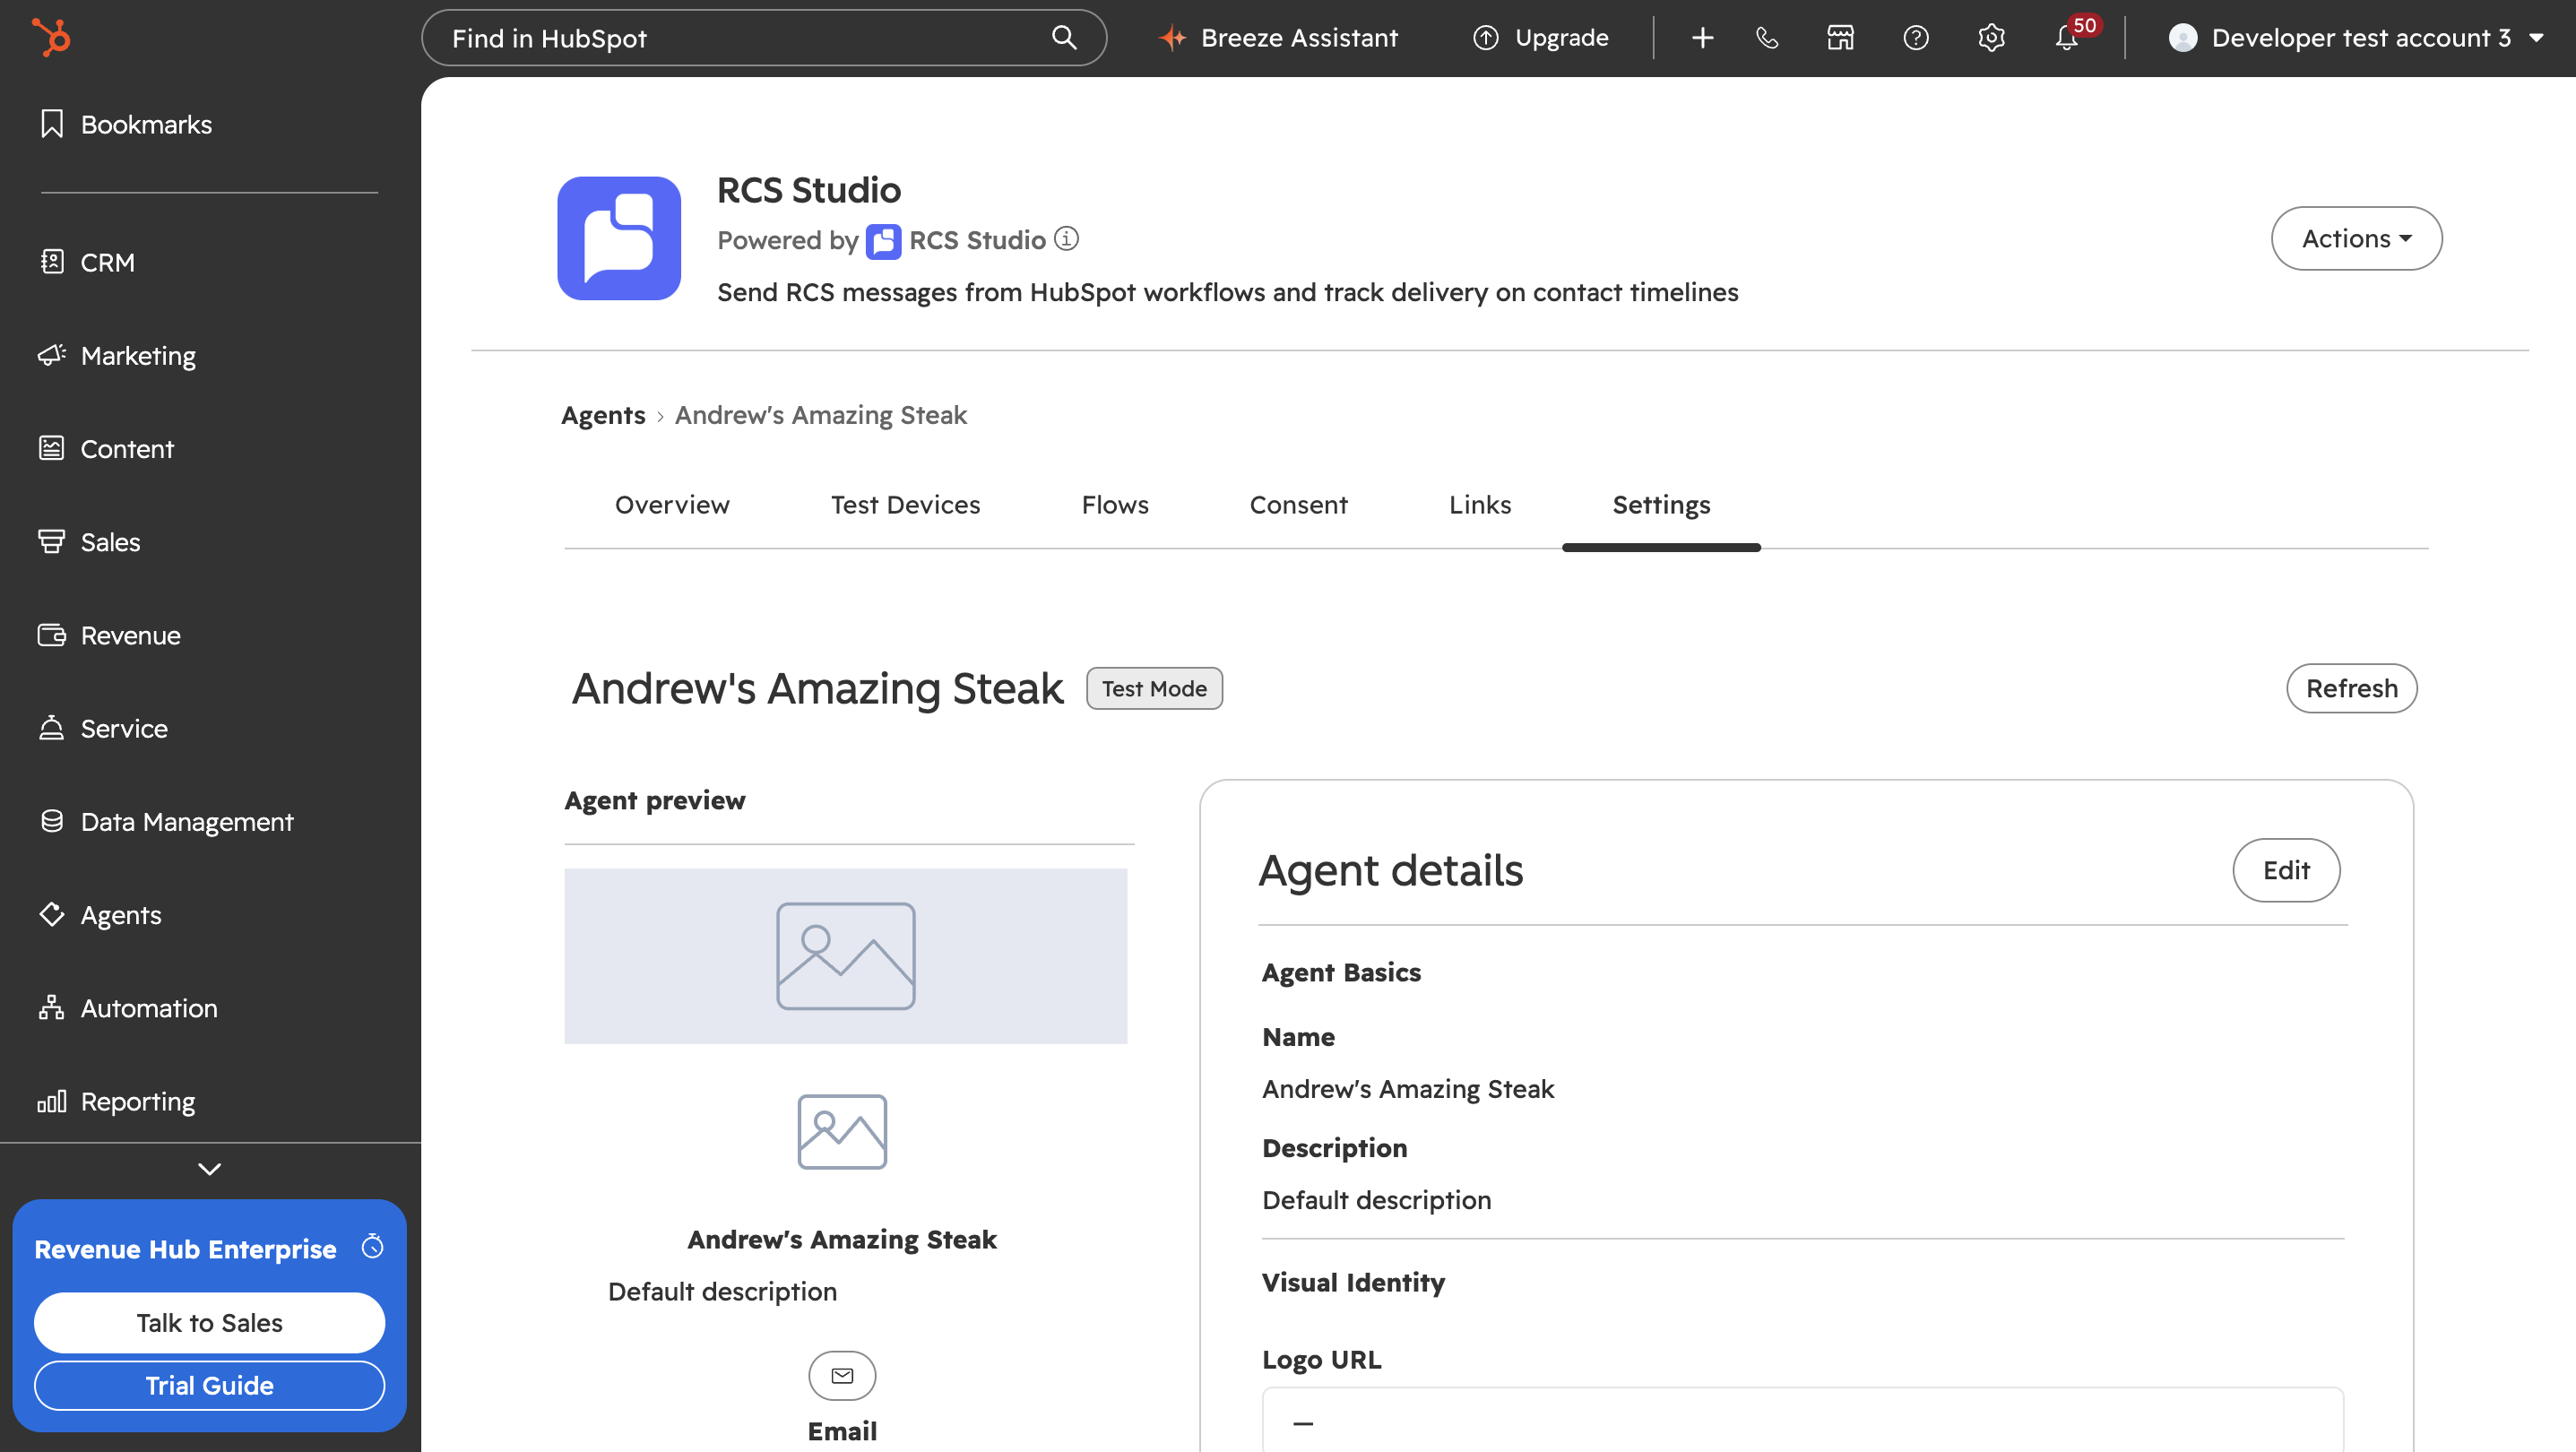
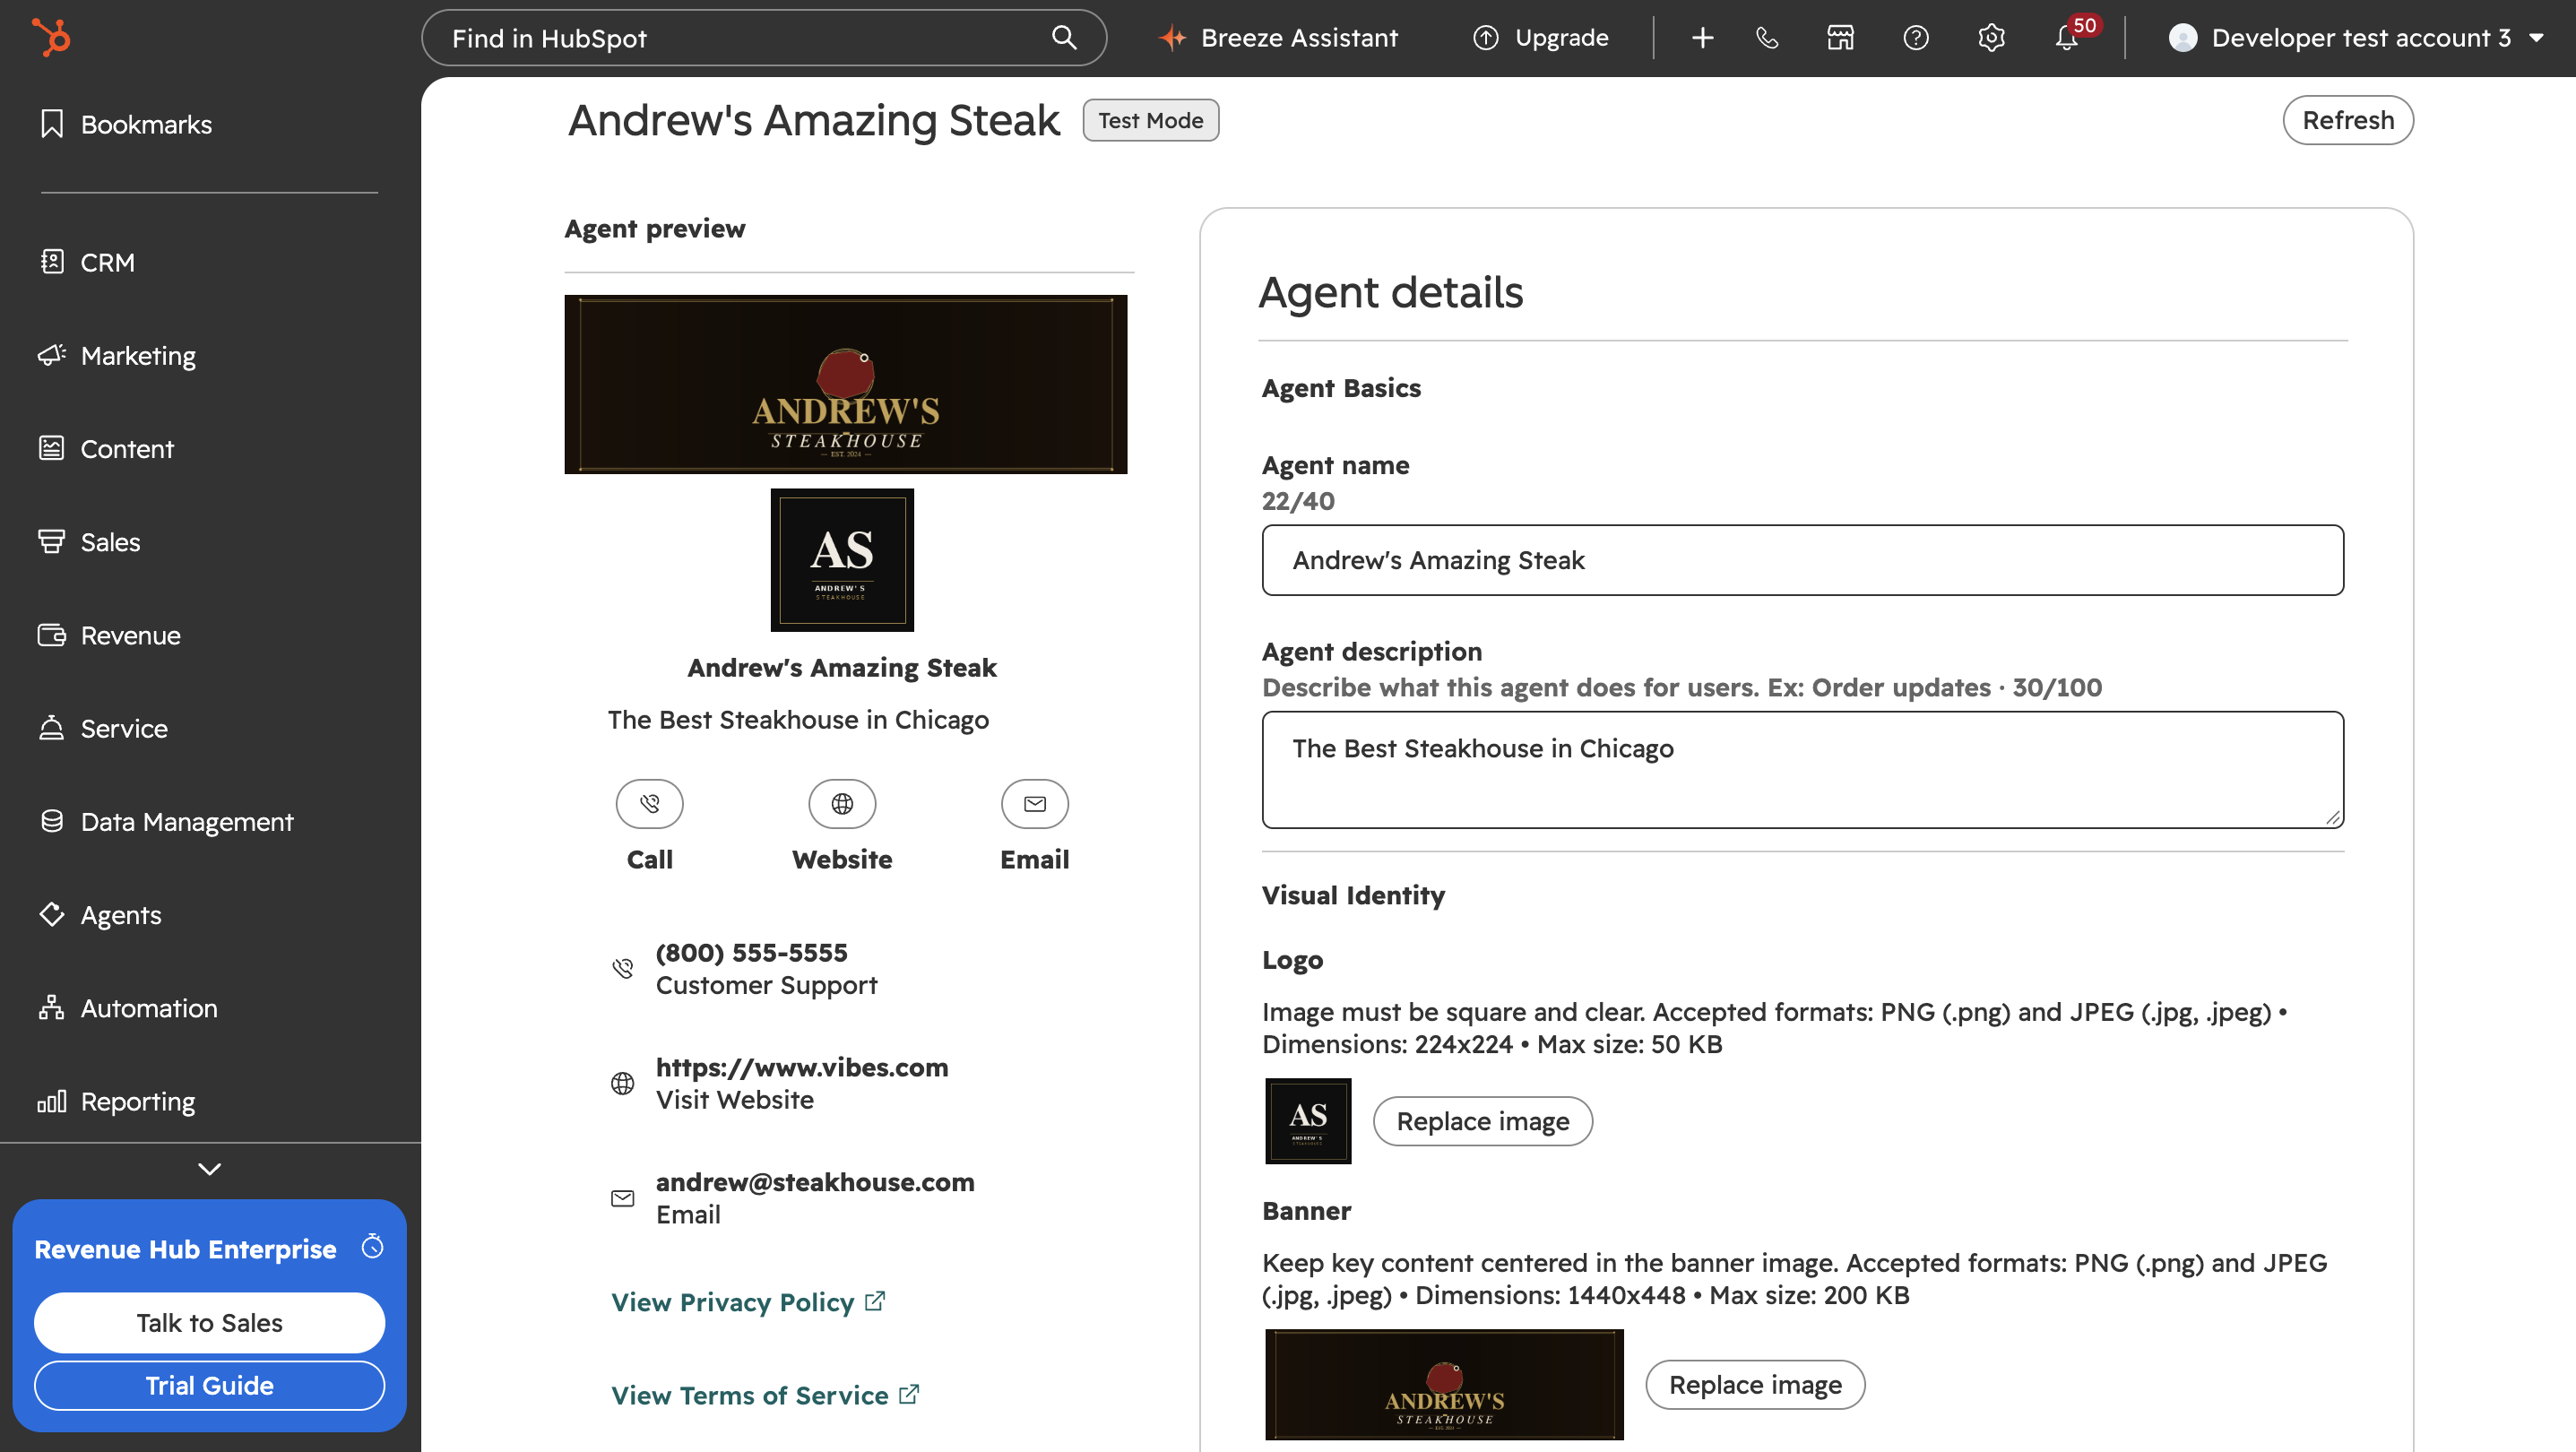
The Settings tab on an agent holds what contacts and carriers see about it. A preview shows how the agent will look on a phone while you edit. The form mirrors the agent settings page in RCS Studio, so the same rules apply in both places; see Update your agent. Details can be edited only until you submit a launch request.
-
Open the agent and go to the Settings tab.
-
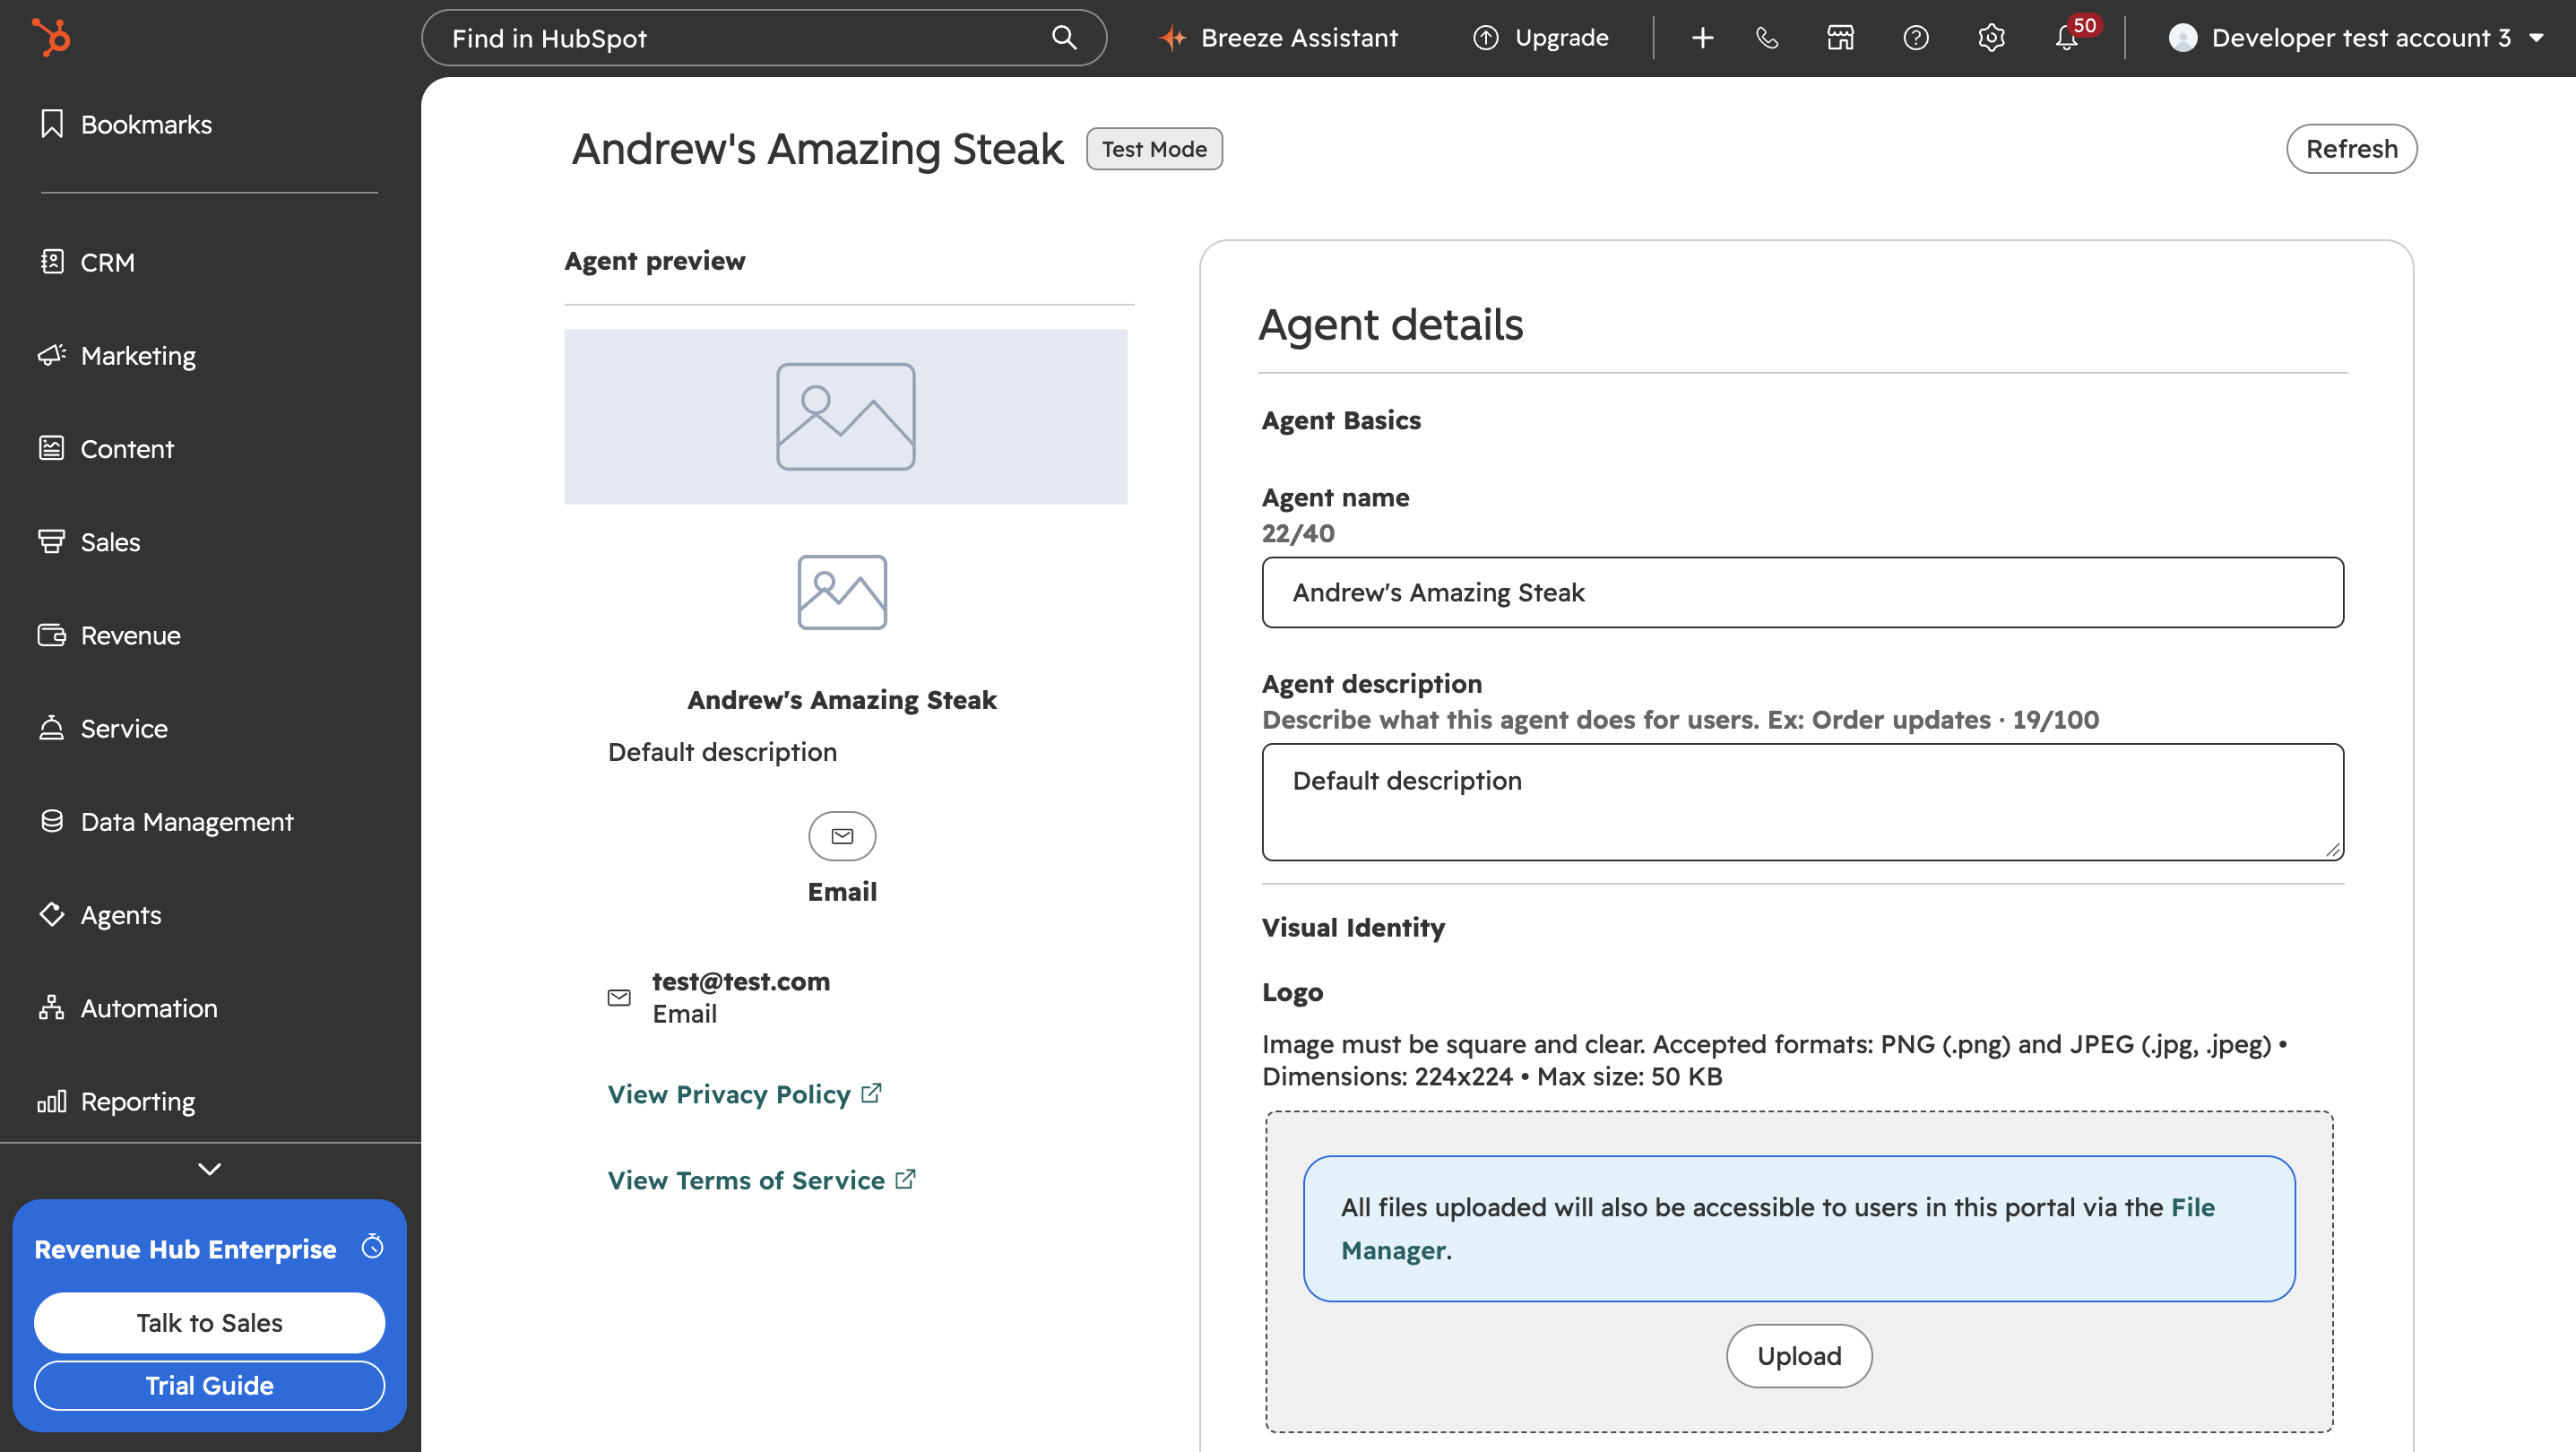
Click Edit.
-
Change the fields below. The preview updates as you type.
-
Click Save. The tag at the top changes to Updating until RCS Studio has applied the change, which takes a few minutes. Cancel discards your changes.
| Field | Rules |
|---|---|
| Agent name | Required, 40 characters at most. |
| Agent description | Required, 100 characters at most. |
| Logo | Square PNG or JPEG, 224x224 pixels, 50 KB at most. |
| Banner | PNG or JPEG, 1440x448 pixels, 200 KB at most. Keep key content centered. |
| Brand color | A hex color such as #FF5733. RCS Studio requires a 2:1 contrast ratio; the app does not check it. |
| Phone, Website, Email | One of each at most, added with Add phone, Add website or Add email. Each has a Label (25 characters at most, for example "Call") and a value: a valid international phone number, a URL starting with http:// or https://, or an email address. At least one of the three is required. Contacts and carriers can see these. |
| Privacy policy link | Required, a URL starting with http:// or https://. |
| Terms and conditions link | Required, a URL starting with http:// or https://. |
Images. Under Logo and Banner, upload a file or click Choose from File Manager to pick an image from your HubSpot file library. The app does not block an image for wrong dimensions, but carriers require them. A file that is not a PNG or JPEG, or is over the size limit, is rejected when you click Save, with a message such as "Logo must be a PNG or JPEG under 50 KB (this file is 62 KB)." When an image is already saved, the control is Replace image. Uploading a new image replaces the current one after you save.
Validation. Nothing is checked until the first time you click Save. Then every problem is shown at once under its field, with "Some fields need attention", and nothing is saved until all are fixed. A field you fix clears its message immediately.
| Message | When |
|---|---|
| "Required" | A required field is empty (name, description, brand color, a contact value, the two links) |
| "Max 40 characters", "Max 100 characters", "Max 25 characters" | Name, description, contact label |
| "Label is required" | A contact method has no label |
| "Invalid URL" | A website or legal link is not a valid URL |
| "Invalid email" | The email address is not valid |
| "Invalid hex color, e.g. #FF5733" | The brand color is not a hex color |
| "At least one contact method is required" | No phone, website or email |
What cannot be cleared. You can replace a saved logo, banner, brand color, privacy policy link or terms and conditions link, but you cannot remove it. Phone, website and email can be removed with Remove phone, Remove website or Remove email as long as one contact method remains.
Renaming the agent
When you save a new agent name, the app updates, in the background shortly after the save, the opt-in list name (if the app created it and you have not renamed it), the agent's entry in the RCS Consent — Opted In and RCS Consent — Opted Out properties, the double opt-in flow's name and description, and the agent name inside the consent prompt, the default STOP confirmation, the opt-in confirmation, the HELP response and, when an inbox is connected, the Chat with agent consent prompt. It does not change a list you renamed or chose yourself, the other flows' names, the JOIN link and QR code, or your own wording: only the agent name is swapped, including in a customised opt-in confirmation. The brand name cannot be changed. If a rename did not reach a message, check the message in the setup guide and edit it by hand.
Locked after a launch request
Once a launch request has been submitted (the agent is Under Review, Verified, Partially Live or Live), the Edit button is gone and the tab shows: "Agent details can no longer be edited once a launch request has been submitted." Below it: "Changes can be requested through your provisioning manager, though modifications may incur additional costs."
Test Mode and test devices
A new agent starts in Test Mode and stays there until you launch it and Google and the carriers approve it. In Test Mode the agent can message only registered test devices, so you can try your flows on real phones before launch. The features that send messages all depend on this: consent, workflows and the inbox. To reach a phone from any of them, register that phone as a test device first.
Test Mode: an agent in Test Mode delivers only to devices that have accepted the tester invite. A message needs both an opt-in and an accepted invite. The app checks only the opt-in when a workflow sends, so the Send RCS Message action can report a send for a phone that never receives it, and the app does not warn you. When a message does not arrive, check the Test Devices tab first.
The invite is a message from "RBM Tester Management" on the phone. The person taps "Make me a tester". Until then the device shows Pending. To try messages on a phone from RCS Studio, see Send a message to a test device.
The Test Devices tab
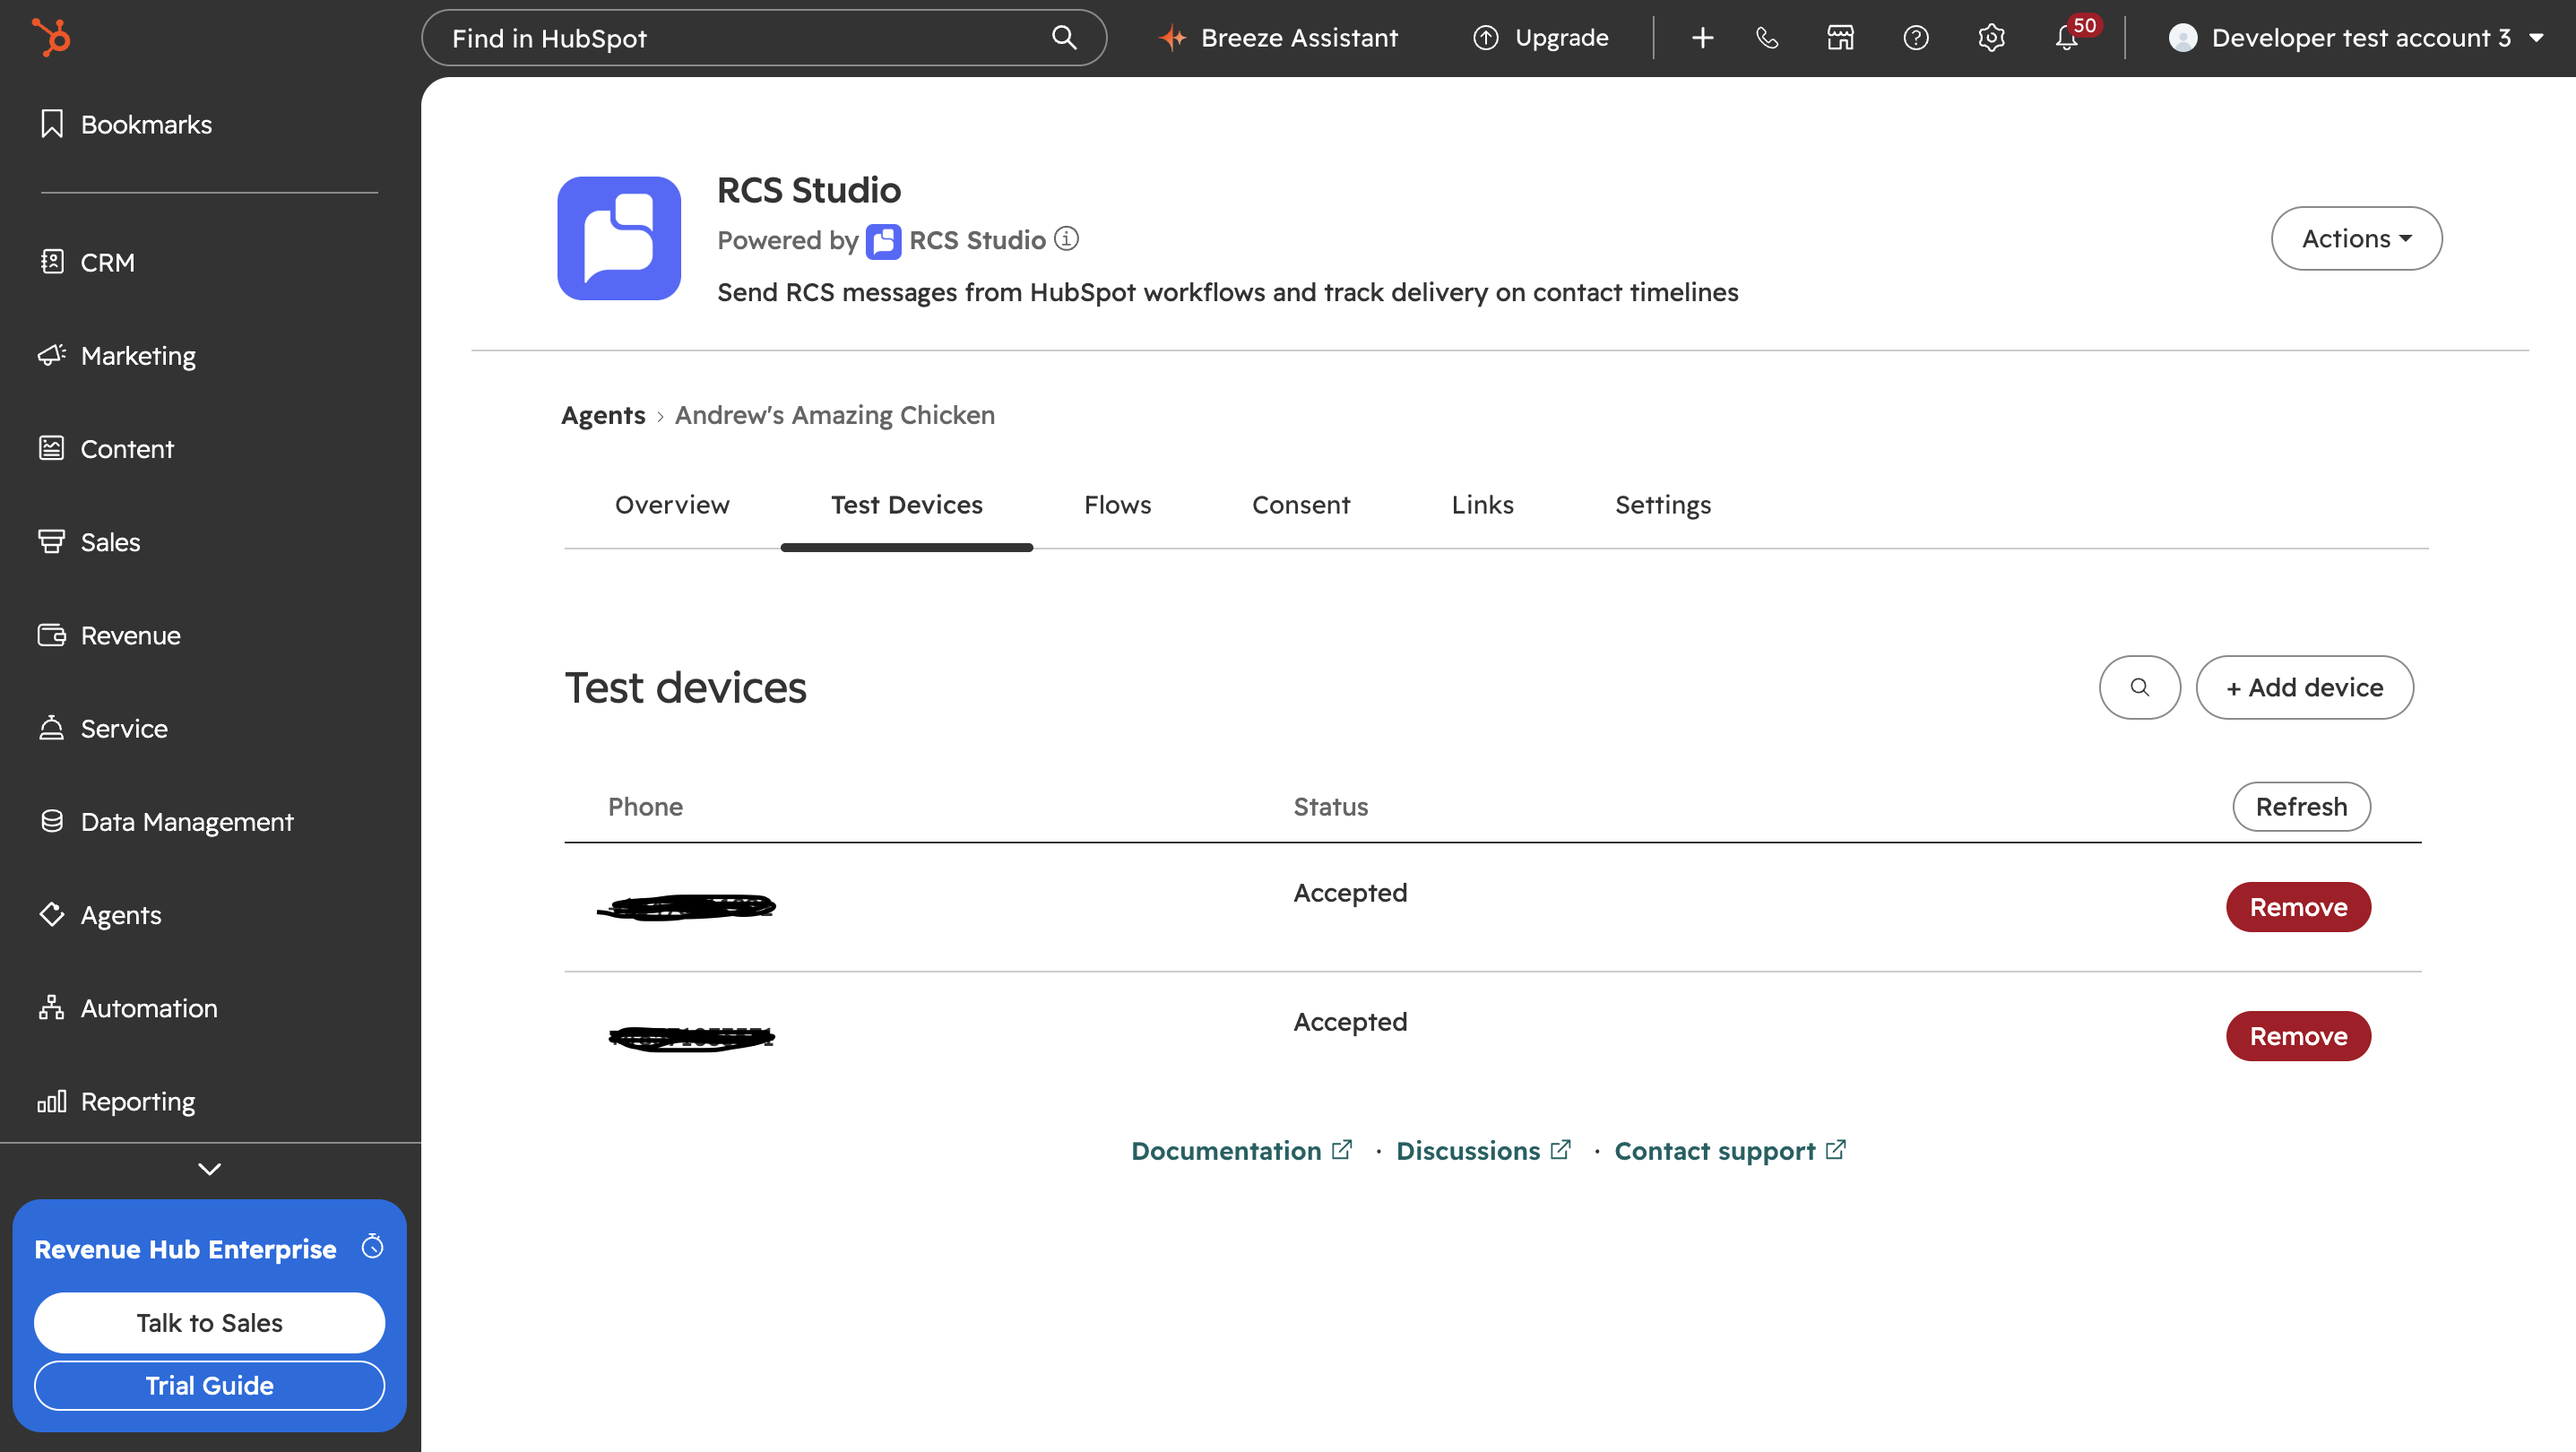
The table lists each phone and its status. Accepted means the invite was accepted. Pending means the invite was sent and not accepted; a declined or missed invite also stays Pending. Refresh reloads the list, the search box filters by number, and Remove deletes a device. Until a device is added the tab says "No test devices registered."
To add a device:
- Click + Add device.
- Enter the number as
+12345550100or as a 10-digit US number, then click Add. The phone must be able to receive RCS. - The tab shows "Invitation sent" with these steps: open the Messages app on the device, find the message from "RBM Tester Management", tap "Make me a tester".
- After the person accepts, click Done, I've accepted on my device, then Refresh. The status changes to Accepted.
How numbers become testers automatically
For an agent that is deployed and not yet launched, the app registers a number as a test device and sends the invite when the number is opted in. If registering fails, what happens depends on the way in.
| Way the opt-in happens | What the app does |
|---|---|
| A contact texts the JOIN keyword, scans the JOIN link or QR code, or confirms the double opt-in prompt | Registers the number and sends the invite before recording the opt-in. If registering fails, the opt-in fails. |
| Record Existing Consent (single number) | Sends the invite, then records the opt-in. If registering fails, the opt-in is refused. A contact who previously opted out is skipped and gets no invite. |
| Import CSV | Sends an invite for each row that will be opted in. A row whose registration fails fails with the error and is not opted in. The result says how many tester invites were sent and that recipients must tap "Make me a tester" before this agent can reach them. |
| The consent API, double opt-in on | Sends the invite and stops: no prompt is sent and no consent is recorded. Call the API again after the person accepts. |
Editing the consent properties on a contact in HubSpot tries to send the invite, and if that fails the consent is still recorded and nothing is shown. Edits to the opt-in list are not read back, so they send no invite. The consent API with double opt-in off sends the invite and records the opt-in at once, and refuses the call if registering fails. With double opt-in on, the response reports tester_invite_sent. The ways to record an opt-in are covered in Add your existing consent and Collect future consent.
The Consent tab advises adding the number as a test device first: "Without test device status, the scan won't capture the opt-in or send a tester invite." Google's platform does not deliver a message from a phone that has not accepted the tester invite to an agent in Test Mode. A JOIN text or QR scan from such a phone never reaches the agent, so nothing is captured and no invite is sent.
An opt-in being recorded does not mean the phone can receive messages. With the API and double opt-in off, with a consent property edit and with the CSV import, consent is recorded while the invite is still Pending.
Limits
RCS Studio limits test devices per agent: 5 on the Free plan and 200 on a paid plan. When the limit is reached, adding a device fails with RCS Studio's message, "Test device limit of 5 reached for basic tier. Remove an existing device or upgrade your plan.", and an automatic registration fails with "Test device limit reached for this account tier. Remove an existing test device or upgrade your plan." Remove a device you no longer need to free a place.
When the agent goes live
The app registers test devices only for agents that are not launched. When RCS Studio reports the agent as launched or launch in progress, or the app cannot read the agent's status, it skips registration and sends no invites. Test devices stay listed on the tab. See Launch and manage your agents.
The setup guide and system flows
Within a few minutes of creation the app builds what the agent needs to collect consent:
- the system flows in RCS Studio, the message flows that handle opting in, opting out and help
- the JOIN link, a link and QR code people use to opt in
- event forwarding, which sends the agent's incoming replies and opt-outs on to the app so it can act on them
- this agent's entry in the two consent properties on your contacts, RCS Consent — Opted In and RCS Consent — Opted Out
The system flows are read-only in the app: the Flows tab shows no Delete button, the workflow message picker never offers them, and a flow you create with one of their names, or "Double Opt-In: ", is refused. Edit their text in the setup guide, not in RCS Studio. The app rewrites them to its current shape when it repairs an agent. The app creates no opt-in list and connects no inbox; both are optional steps in the guide.
Open the guide
-
Open the agent.
-
On the Overview tab, the Consent & Agent Setup section has tiles for Opt-Out Capture, Opt-In Capture, Help Capture and Inbox. Click the button on one of them.
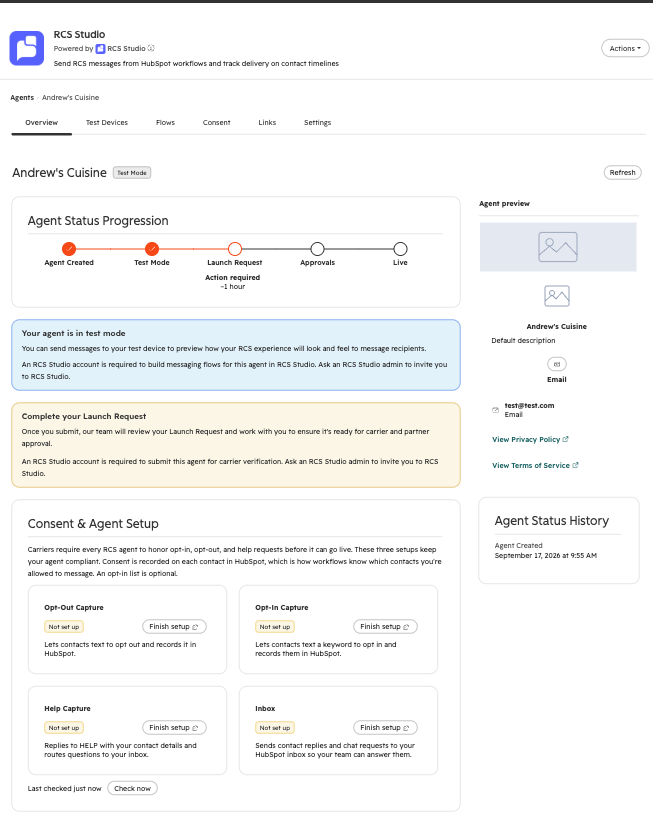
The guide opens at that step. The steps are tabs across the top, so you can move between them. The agent is ready when all four steps are healthy.
| Step | What it does |
|---|---|
| Opt-Out Capture | Turns on the STOP flow and its confirmation message. It also sets how your team sees consent: an optional opt-in list and the RCS Consent card on contact records. Neither is required, but the tile shows Not set up until you pick one. See Consent management. |
| Opt-In Capture | The JOIN flow, the opt-in confirmation and double opt-in. |
| Help Capture | The HELP reply, its buttons and Chat with agent. |
| Inbox | The connection to a HubSpot Conversations inbox. Needed for two-way messaging, not for sending from workflows. |
Without setup access the tile buttons are hidden and the guide shows "Setup is managed by your HubSpot super admin", though tile statuses stay visible. With view access but not edit access, the guide opens read-only and Save and Fix are disabled.
The four steps in brief
Each is covered in detail in Collect future consent.
- Opt-out. A contact opts out by texting one of 20 fixed keywords, such as
STOP. The flow records the opt-out on the contact and replies with a confirmation whose text you can change. - Opt-in. A contact opts in by texting a JOIN keyword or using the JOIN link. A new agent starts with JOIN and double opt-in on. You can change the confirmation text, which must mention STOP and HELP.
- Help. A contact who texts
HELPorINFOgets your contact details and buttons. A new agent has a placeholder support email, so replace it. Chat with agent is an optional button that needs a connected inbox. - Unrecognized messages. Any other text goes to the Unrecognized Message flow, which catches a typed opt-out and otherwise replies with the HELP reply or "Sorry, we didn't understand that. Reply HELP for help or STOP to opt out." Nothing needs switching on.
A contact who taps Block in the messaging app is recorded as an opt-out, "Blocked in messaging app", with no reply.
The Inbox step
The Inbox tile appears only to HubSpot super admins, and only if your HubSpot account granted the inbox permissions. Without the permissions or the plan the step says workflow sends and consent work normally. Connecting an inbox replaces the agent's own default state with the full Unrecognized Message flow and adds the Inbox Reply flow. Requirements, connecting and changing an inbox are covered in Two-way inbox.
The system flows
The app creates most of these when it creates the agent. Inbox Reply and the full Unrecognized Message come when you connect an inbox.
| Studio flow name | Step | Trigger |
|---|---|---|
| JOIN Entry | Opt-In Capture | JOIN, START, SUBSCRIBE, OPTIN, or the JOIN link |
| Opt-In Confirmation | Opt-In Capture | After an opt-in |
| Double Opt-In: {agent name} | Opt-In Capture | The consent API, or an opted-out or no-record contact who texts |
| STOP Opt-Out | Opt-Out Capture | The 20 opt-out keywords |
| STOP Confirmation | Opt-Out Capture | After an opt-out |
| HELP Response | Help Capture | HELP, INFO |
| Unrecognized Message | Opt-Out Capture (minimal), Inbox (full) | Any text that is not a keyword |
| Inbox Reply | Inbox | A reply during a live chat |
The flows use two connectors in your RCS Studio account: HubSpot Consent (your account name) from the first agent, and HubSpot Escalation (your account name) when you connect an inbox. Their events reach the app through your portal's event forward URL, shown read-only on the app's Settings page. See Flows, links and connectors.
An agent you already have in RCS Studio
You do not need a new agent. Agents in the RCS Studio account you connected appear in the same Agents page, but the app has not built any system flows on them, so their tiles show Not set up, Needs fixing or Not checked yet. Until an agent has been set up, a contact who texts STOP or JOIN on it is not recorded in HubSpot. To bring one in:
- Open the agent and click Check now on the Overview tab.
- Open the first tile that needs fixing.
- In the Opt-Out Capture, Opt-In Capture and Help Capture steps, turn the flow on and review its message, or click Fix where the banner offers it.
- Connect an inbox in the Inbox step if you want two-way messaging.
Your existing flows are kept, and the app adds its own beside them. If the agent is already launched, see When the agent goes live for what that means for test devices.
Health checks and repairs
The app checks every flow and setting it built for an agent against the shape the current app version expects. The four tiles show the result, and each setup step shows the same problems in a banner at the top. The checks look for an agent that is missing a flow, a connector or a consent property, which would stop it collecting consent. The app never repairs an agent on its own: you click Fix.
| Tag | Meaning and button |
|---|---|
| A percent tag | The step is healthy. The tag shows how much of the step is complete. The button says Edit. |
| Needs fixing | Something the app built is missing, broken or needs your input. The button says Fix. |
| Not checked yet | The check has not finished or could not reach RCS Studio. The button says Open setup. In a step, the banner says "Couldn't check this right now." with Retry. |
| Checking | A check is running. |
| Not set up | Only setup items remain, such as a feature not turned on or no inbox. The button says Finish setup. |
While the agent is still being provisioned the tile shows a spinner instead of a tag, and while a tile shows "Setting up…" its button is disabled. Check now below the tiles runs the check again and updates Last checked. A check that cannot finish keeps the last result and says "Couldn't finish checking. Showing the last result."
What Fix does
Most problems are fixed in one click. Fix and Save run the same repair with your current values. Fix re-creates or repairs a missing or broken flow, connector or consent property. It keeps your custom text (confirmations, HELP, chat and end-of-chat messages), button labels, message frequency and support hours, and it leaves recorded consent alone. An empty message gets the default. Running it again on a healthy agent changes nothing.
A step that needs your input opens instead of repairing. Correct the value, then Save. The save also repairs the rest of that step. A step that needs input is marked "(step)" in the table below. It dims the step, and "Press Fix to edit this step." tells you to open it. A deleted opt-in list or inbox needs a new choice, and a changed consent property type must be restored in HubSpot settings to multiple checkboxes.
The repair also points a link that RCS Studio shows as "Needs retargeting" (its flow was deleted) back at the new JOIN flow, so printed QR codes keep working, and moves a JOIN, STOP or HELP keyword to the app's flow if another flow owns it. Your own keywords are never touched.
After an app update the Inbox tile can show Needs fixing until you click Fix once, because a new version can change a flow's shape. Until then Chat with agent tells a contact "Sorry, we couldn't connect you to an agent right now. Please try again in a few minutes."
The health rows
Setup items show as Not set up: "STOP opt-out is not turned on", "JOIN opt-in is not turned on", "Your HELP reply is not set up", "No inbox is connected", "No opt-in list is connected", "Turn on the opt-in list or add the RCS Consent card". Health problems appear at most one per row, with these titles. Opt-Out, Opt-In, Help and Inbox are the four tiles the row feeds.
| Row | Problem title | What it means and what Fix does |
|---|---|---|
| Consent connector (Opt-Out, Opt-In, Inbox) | "The consent connection to HubSpot is missing" or "...is broken" | Opt-ins and opt-outs are not recorded on contacts. Fix sets the connection up again; messages are kept. |
| Consent properties (Opt-Out, Opt-In, Inbox) | "The HubSpot consent properties are broken"; "A HubSpot consent property was changed to another type" (step) | Fix re-creates the properties and this agent's option; recorded consent is kept. Restore a changed type in HubSpot settings. |
| Opt-in list (Opt-Out, Opt-In; only when a list is linked) | "Your opt-in list was deleted in HubSpot"; "...is not a static list"; "...is not a contact list" (all step) | Choose another list or create a new one. |
| STOP flow (Opt-Out, Inbox) | "STOP opt-out is missing" or "...is broken" | Fix re-creates or repairs it and points the STOP keywords back to it; the confirmation text is kept. |
| STOP confirmation (Opt-Out, Inbox) | "The STOP confirmation reply is missing" or "...is broken" | Fix creates it with the default reply, or repairs it and keeps your text. |
| JOIN flow (Opt-In, Inbox) | "JOIN opt-in is missing" or "...is broken" | Fix re-creates or repairs it and points the JOIN keywords and your opt-in link back to it. |
| Opt-in confirmation (Opt-In, Inbox) | "The opt-in confirmation is missing" or "...is broken"; "Your opt-in confirmation does not mention STOP and HELP" (step) | Fix creates the default or repairs it and keeps your text. Carriers require STOP and HELP: add them and save. |
| Consent prompt (Opt-In with double opt-in, Opt-Out with STOP on and no inbox, Inbox) | "The consent prompt is missing" or "...is broken"; "The consent prompt asks contacts to type a reply" | Fix creates or repairs it, keeping your prompt text and button labels. The typed-reply step is removed; an old default text is replaced. |
| Unrecognized (Opt-Out with no inbox, Inbox) | "The consent check for customer messages is missing" or "...is broken" | The default state cannot catch typed opt-outs. Fix sets it up again; messages are kept. For an agent with its own default state and no inbox, your own routing is not checked, and Fix and Save cannot clear it. |
| Inbox reply (Inbox) | "Live chat with your inbox is missing" or "...is broken" | Fix repairs it; the end-of-chat message, chat text and support hours are kept. |
| Inbox connector (Inbox) | "The HubSpot consent lookups are broken" | The agent cannot look up consent or spot STOP and JOIN in chat. Fix restores them. |
| Inbox connection (Inbox) | "The inbox connection is broken"; "Your inbox setup did not finish"; "Your HubSpot inbox channel was deleted", "Your connected HubSpot inbox was deleted", "Your HubSpot inbox channel is not attached to an inbox" (the last three: step) | Fix reconnects the same inbox when one is stored, keeping chat text, hours and confirmations; otherwise it opens the step and Save reconnects. For a deleted channel or inbox, disconnect the inbox, then connect one again. |
| HELP flow (Help, Inbox) | "Your HELP reply is missing" or "...is broken" | Fix creates it with the default reply and a placeholder email, or repairs it keeping your text, details, chat text and hours. |
| Help content (Help) | "Support hours for Chat with agent are missing"; "Your HELP reply still shows the placeholder support email"; "Your HELP reply has no contact details" (the last two: step) | Fix fills missing support hours with "Mon–Fri, 9:00 AM–5:00 PM CT" and never overwrites hours you set. Replace [email protected] with a real website, phone or email. |
| Event forwarding (all four) | "Message forwarding to HubSpot is broken" | RCS Studio is not sending incoming messages to HubSpot. Fix turns forwarding back on; nothing else changes. |
Troubleshooting
| Symptom | Cause | Fix |
|---|---|---|
| "Agent creation failed" with "A brand named ... already exists in your RCS Studio account." or "RCS Studio could not create the brand. This usually means the brand name is already taken in RCS Studio." | The brand name is taken. | Choose Agent only to add an agent to that brand, or pick a different name. |
| "Your RCS Studio account setup is incomplete. Please disconnect and reconnect the integration from Settings." | The install did not finish. | A super admin reconnects the app. See Install RCS Studio for HubSpot. |
| A message that your plan does not allow this action, or "Only one agent is available on the basic plan. Upgrade to create additional agents." | Your plan's limit is reached. RCS Studio decides the limits and the app shows its message. | Upgrade; see Launch and manage your agents. |
| The agent stays on Created | Setup is still running or failed. | Wait a few minutes and click Refresh. If it shows Setup Failed, contact [email protected]. |
| "Fix agent details before your next update" warning on the Settings tab | Some saved details are in a format carriers reject, and the warning lists them. | Click Edit, fix the fields and Save. Updates made while these problems exist can put the agent into a failed state that needs support. |
| A workflow shows a send but the phone got nothing, or the device stays Pending | The phone has not accepted the tester invite, or it was missed or declined. | If Pending, remove the device, add it again and accept the new invite on the phone. If missing, add the number. |
| An opt-in is refused: "This agent is not deployed, so testers cannot be invited and opt-ins cannot be delivered. Contact [email protected] for help." | The agent is Created, Updating, Setup Failed or its status is unknown. This applies to JOIN, double opt-in confirm, the API, Record Existing Consent and CSV rows, and includes the few minutes after you save agent details. | Wait a few minutes; if it persists, contact support. |
| "This agent name is already in use. Please open the form and choose a different name." | Another agent has that name. | Choose a different agent name. |
Texting JOIN or STOP gets no reply | The step's flow is off or broken | Open the step, make sure the flow is on and check Last checked. If it still fails, email [email protected] |
| "Enter a phone number in E.164 format (+12345550100) or 10-digit US format" | The test device number is not valid. | Correct the number. |
| "This number is already registered as a test device." | It is already on the list. | Nothing to do. |
| "Invalid phone number. Please provide a valid number that supports RCS messaging." | RCS Studio rejected the number. | Use an RCS-capable phone. |
| "Failed to add device." | The request failed. | Try again. |
| "Test device limit of 5 reached for basic tier. Remove an existing device or upgrade your plan." | The plan's device limit is reached. | Remove a device you no longer need, or upgrade. |
| JOIN text or QR scan captures nothing from a phone | The phone has not accepted the tester invite: "Without test device status, the scan won't capture the opt-in or send a tester invite." | Add the number as a test device and accept the invite first. |
API call returns tester_invite_sent and no consent | Double opt-in is on and the number was not a tester. | Accept the invite, then call the API again. |
| "Failed to update agent details" | The save was refused or did not complete. | Try again. If the message names a field, fix it. |
| File Manager shows "Missing permissions" | The app lacks permission to read your HubSpot file library. | Ask a HubSpot admin to reconnect the RCS Studio app, then try again. |
| The step is dimmed | The step needs fixing. | "Press Fix to edit this step." |
| Fix reports an error | The repair failed. | The message is shown under Fix. Click it again. |
| A rename did not reach a message | The background update failed for that item. | Check the message in the setup guide and edit it by hand. |
| Needs fixing returns after Fix | A step needs your input, or RCS Studio is still changing. | Open the step, correct the value, Save, then Check now. |
Next
When the four tiles are healthy and Last checked is recent, the agent is ready for test devices. To message real contacts, choose a plan and launch: Launch and manage your agents. Then read Consent management to see how consent works and where you see it.
Updated 9 days ago