Manage media assets
The Media tab in your agent provides a centralized library of images you can reuse across messages. Upload once, reference from any message in the agent. Saved assets can be used in rich cards and carousels.
Image requirements
| Property | Requirement |
|---|---|
| File type | JPEG / JPG / PNG |
| Max file size | 1 MB |
| Recommended ratio | 3:2 (e.g. 1620 × 1080 px) |
| Density-independent pixels | 168 DP |
| Safe area | Keep important content ~5% away from the edge (e.g. 1458 × 972 px) |
The safe area ensures content isn't cropped on devices with different screen sizes.

Uploads that exceed 1 MB are rejected. Compress images before uploading if needed.
Upload an asset
- Open your agent and go to the Media tab
- Click Upload
- Select a file from your device (JPEG or PNG)
- Click Upload
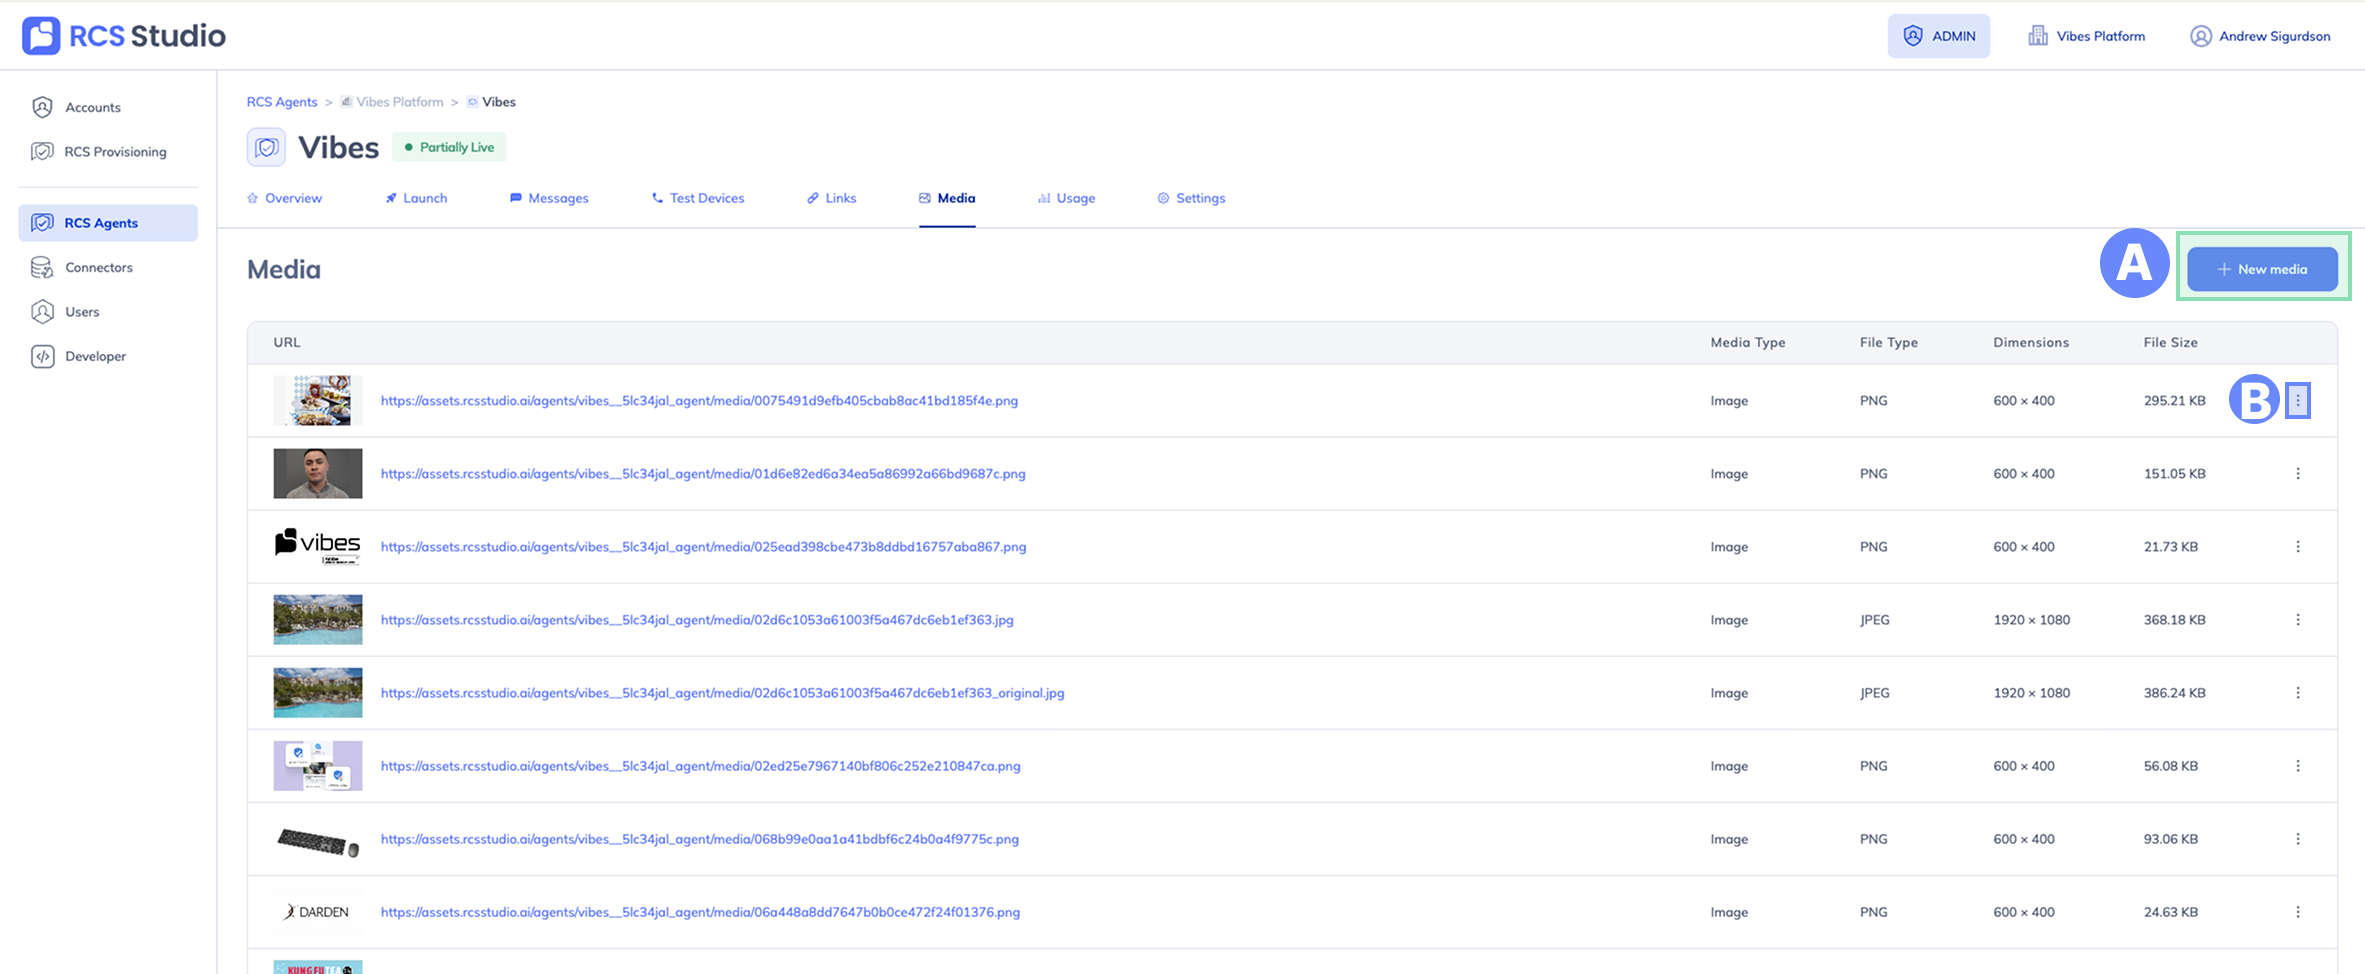
A. + New media — Upload a new image to the library.
B. ⋮ — Copy the media asset's URL.
Once uploaded, the asset appears in the library with its URL, media type, file type, dimensions, and file size. The URL is what you reference when using the asset in a message.
Rename or delete an asset
Renaming and deleting assets is only available via the API.
Deleting an asset removes it permanently. Any messages that reference the asset's URL will show a broken image. Check which messages use the asset before deleting.
See the Assets API reference for the full spec.
Upload via the API
API uploads are available. See the POST /agents/:agentId/assets in the API Reference section for a complete walkthrough.
See also
- Assets API reference — Full API spec for listing, uploading, renaming, and deleting assets