Collect data via RCS
RCS Studio allows you to collect data from your customers and store it for future use. In this demo, we’ll teach you how to:
- Collect and store data from your users
- Use an API operation to transform collected data
- Use previously collected data to personalize your messages
Step 1: Collect first and last name.
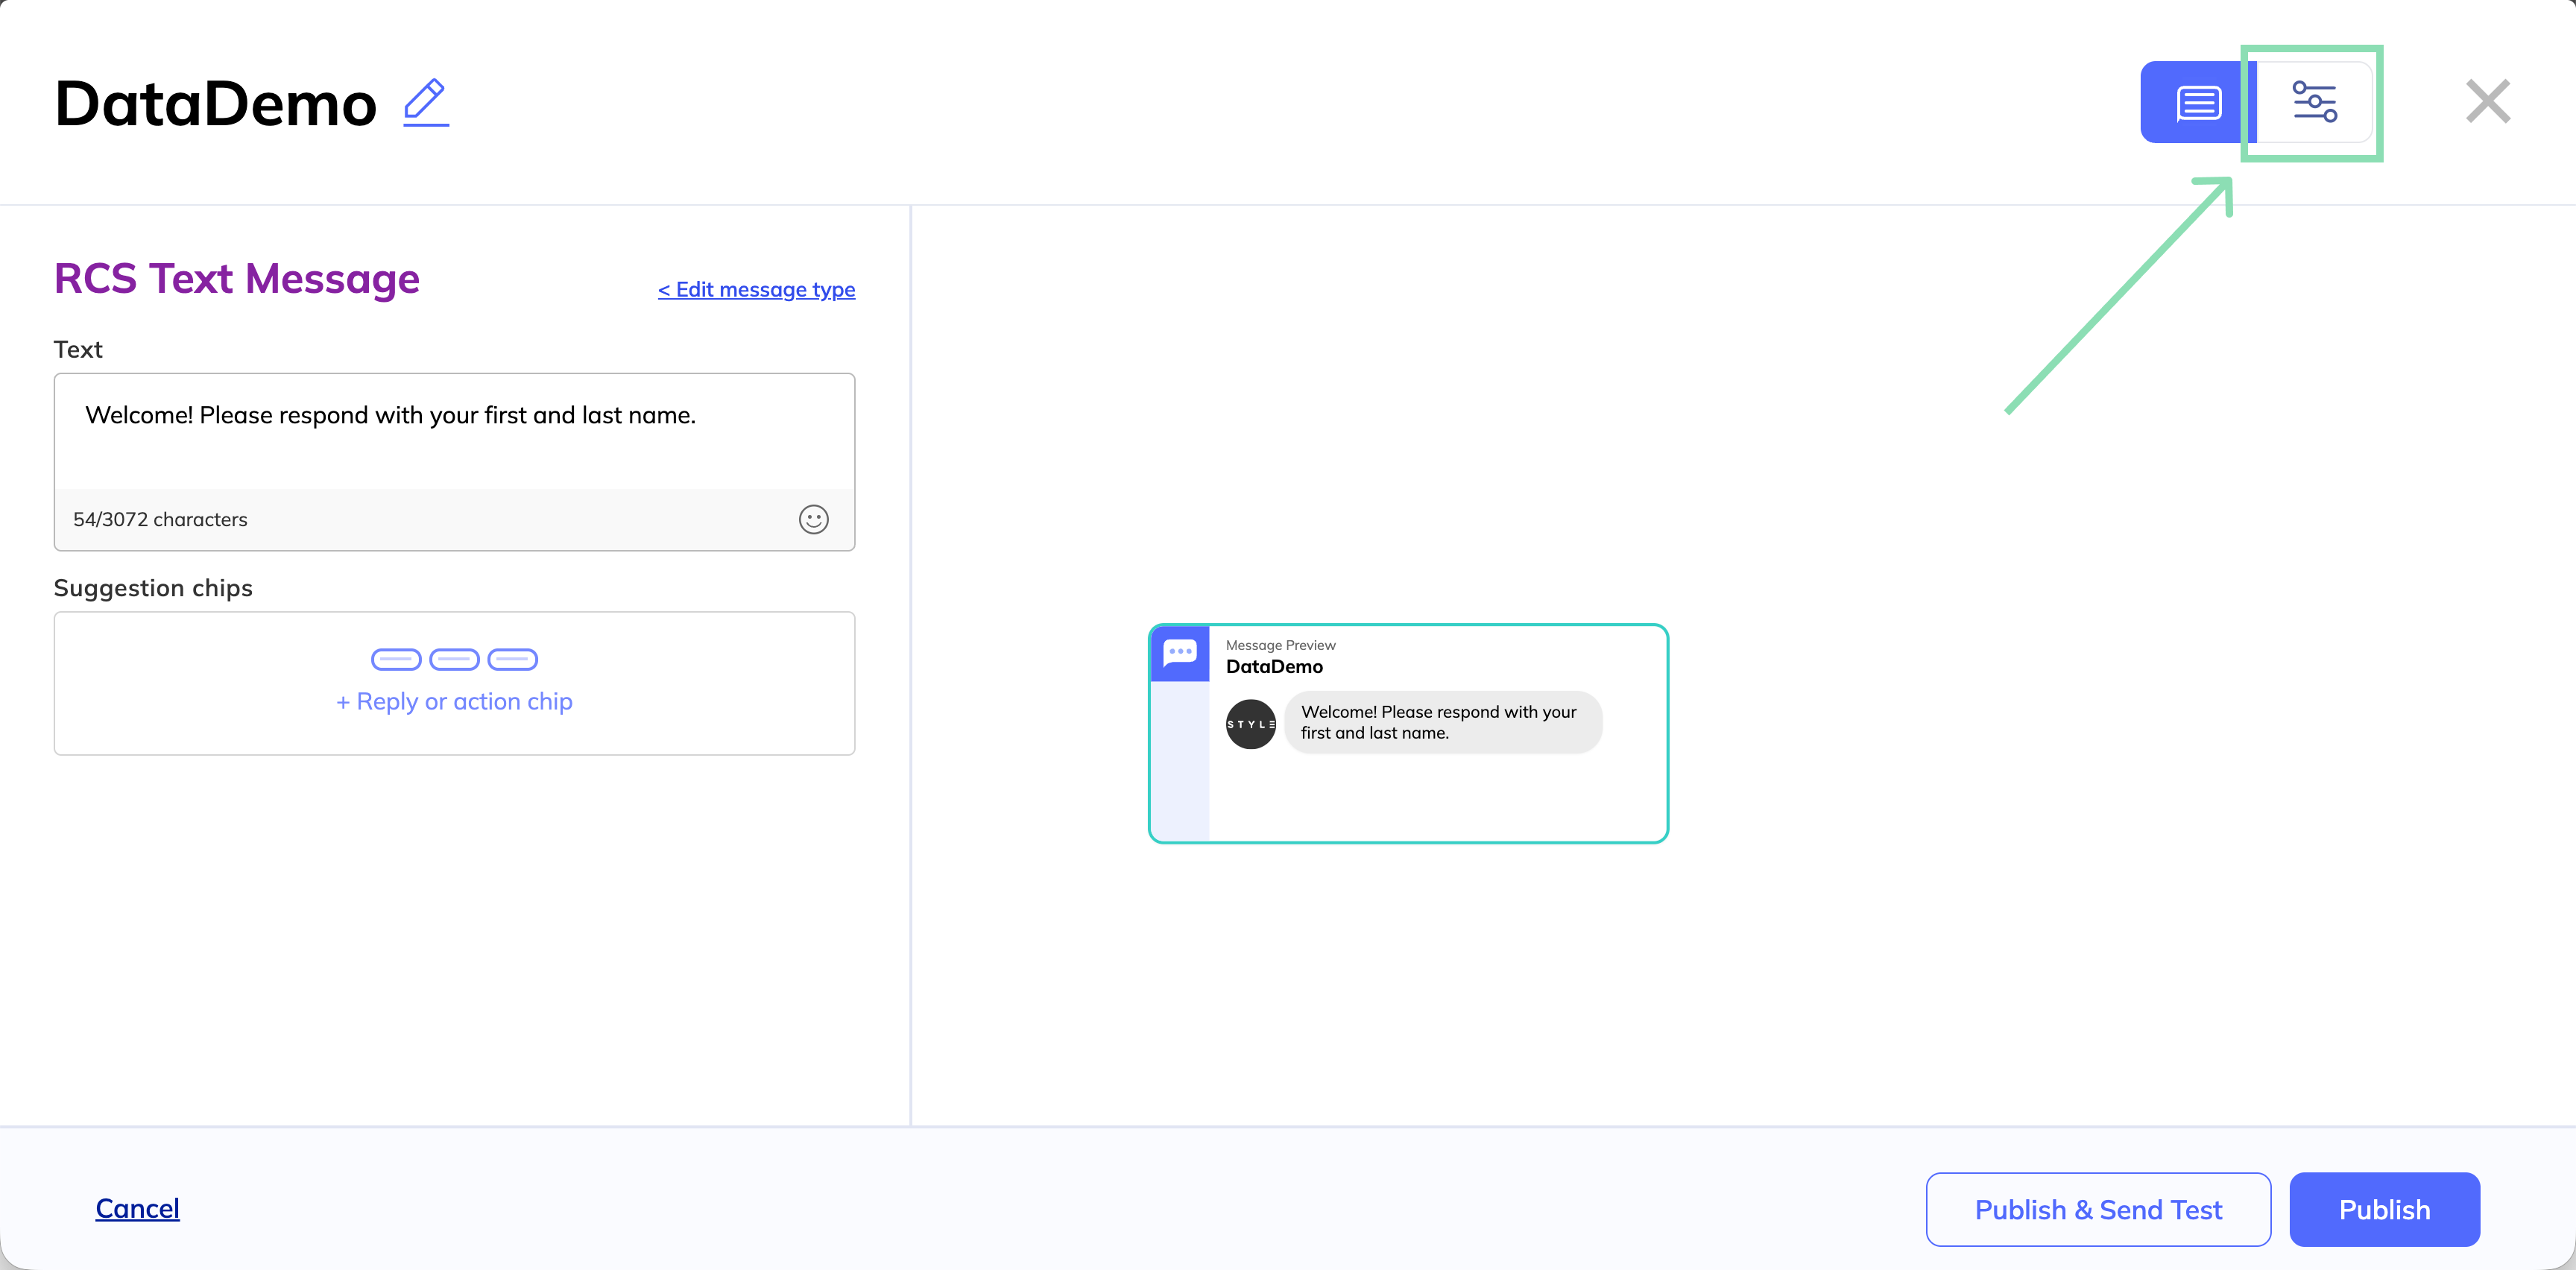
To start, create a new view, and give it a memorable name. We’ll call ours DataDemo. Our first step is to build a text message prompting your users to respond with a first and last name.
Before we leave this view, we will have to create an input assignment that will collect and store the data provided to you by your user. To do this, go to the Advanced panel using the toggle in the top right corner.
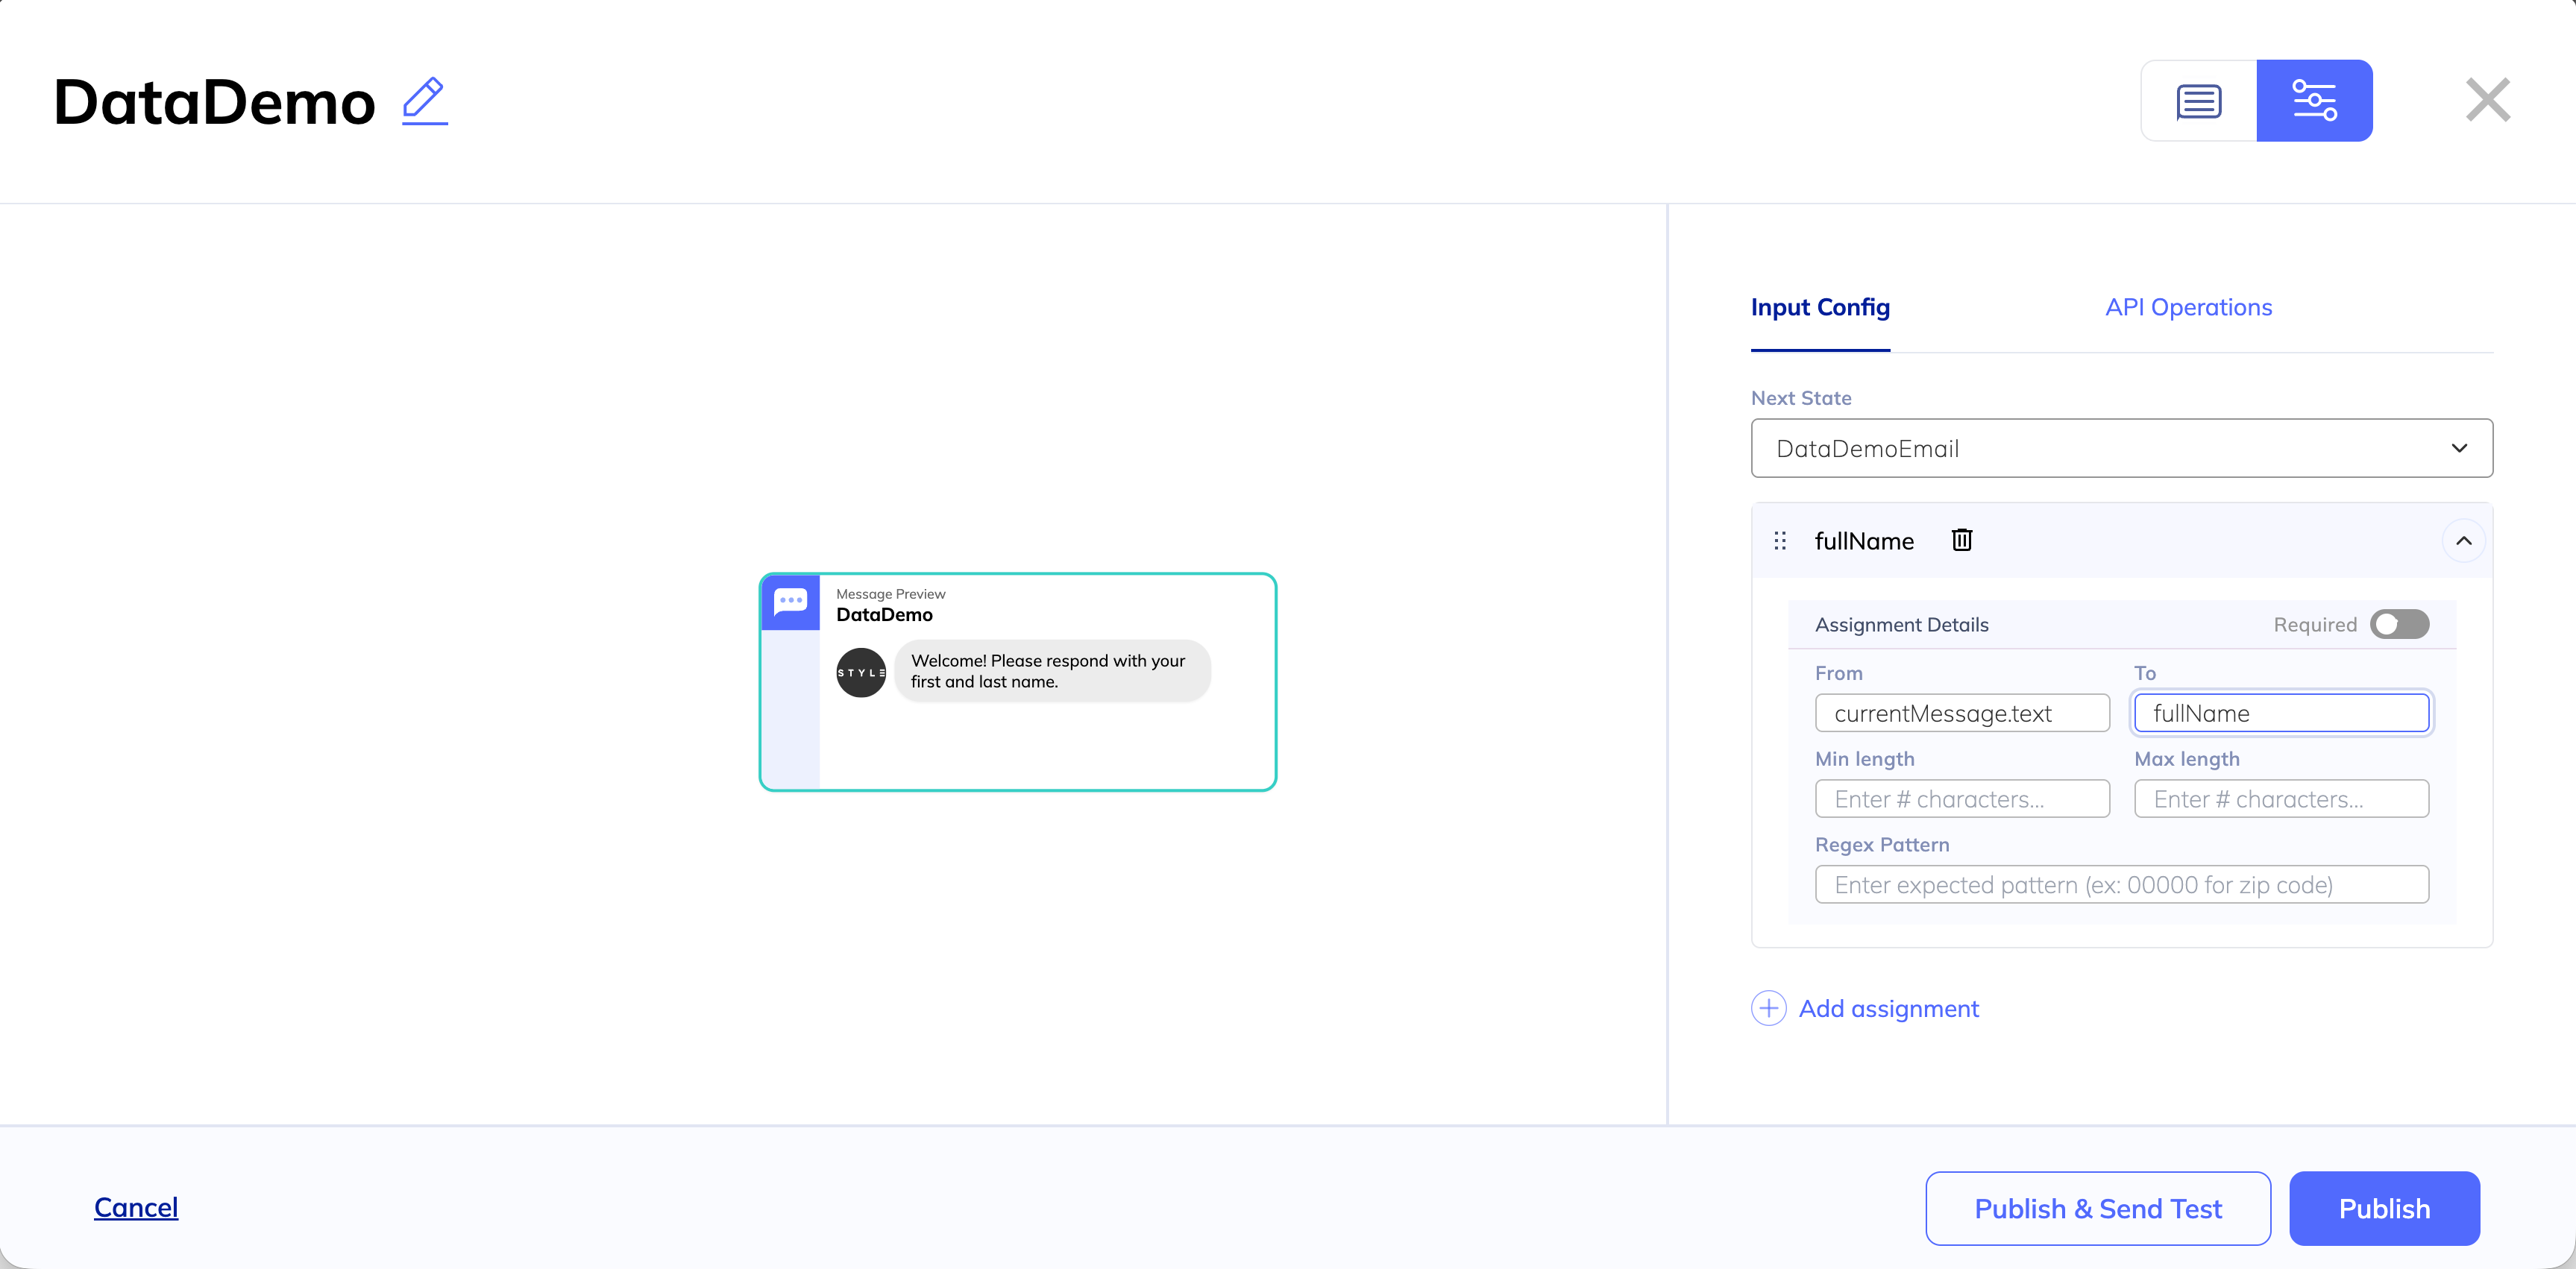
Under Input config, click + Add assignment.
First, we’ll choose a Next State, which is the view that should be returned after the user responds with an input. In this case, we haven’t created that response yet, so we will give the response a unique name and build that out later. For this example, we’ll call it DataDemoEmail.
Under Assignment details, we can collect the user’s response and map it to a specific field we can reference later. In From, we add currentMessage.text to collect the user response. In To, we create a new field called fullName. Remember this field name - we’ll need this again later.
Publish your message.
Step 2: Transform & use data.
In our second message, we want to both personalize our message and ask for additional data. To start, we create a new view and give it the name we entered in Next State in the previous state. Remember, we named this DataDemoEmail, so we give our new view this name.
Before we start writing the text, we want to transform the data we got from our previous message. We asked for our user to respond with first and last name, but we only want to address them by their first name. To do this, we’ll use a built-in API to split the first and last name into two referenceable fields.
In the Advanced panel, go to API operations. Choose the API identified by the connector ID String Utility Functions. Choose the operation split, and give your operation a context key, which you will reference later. We’ll call ours splitName.
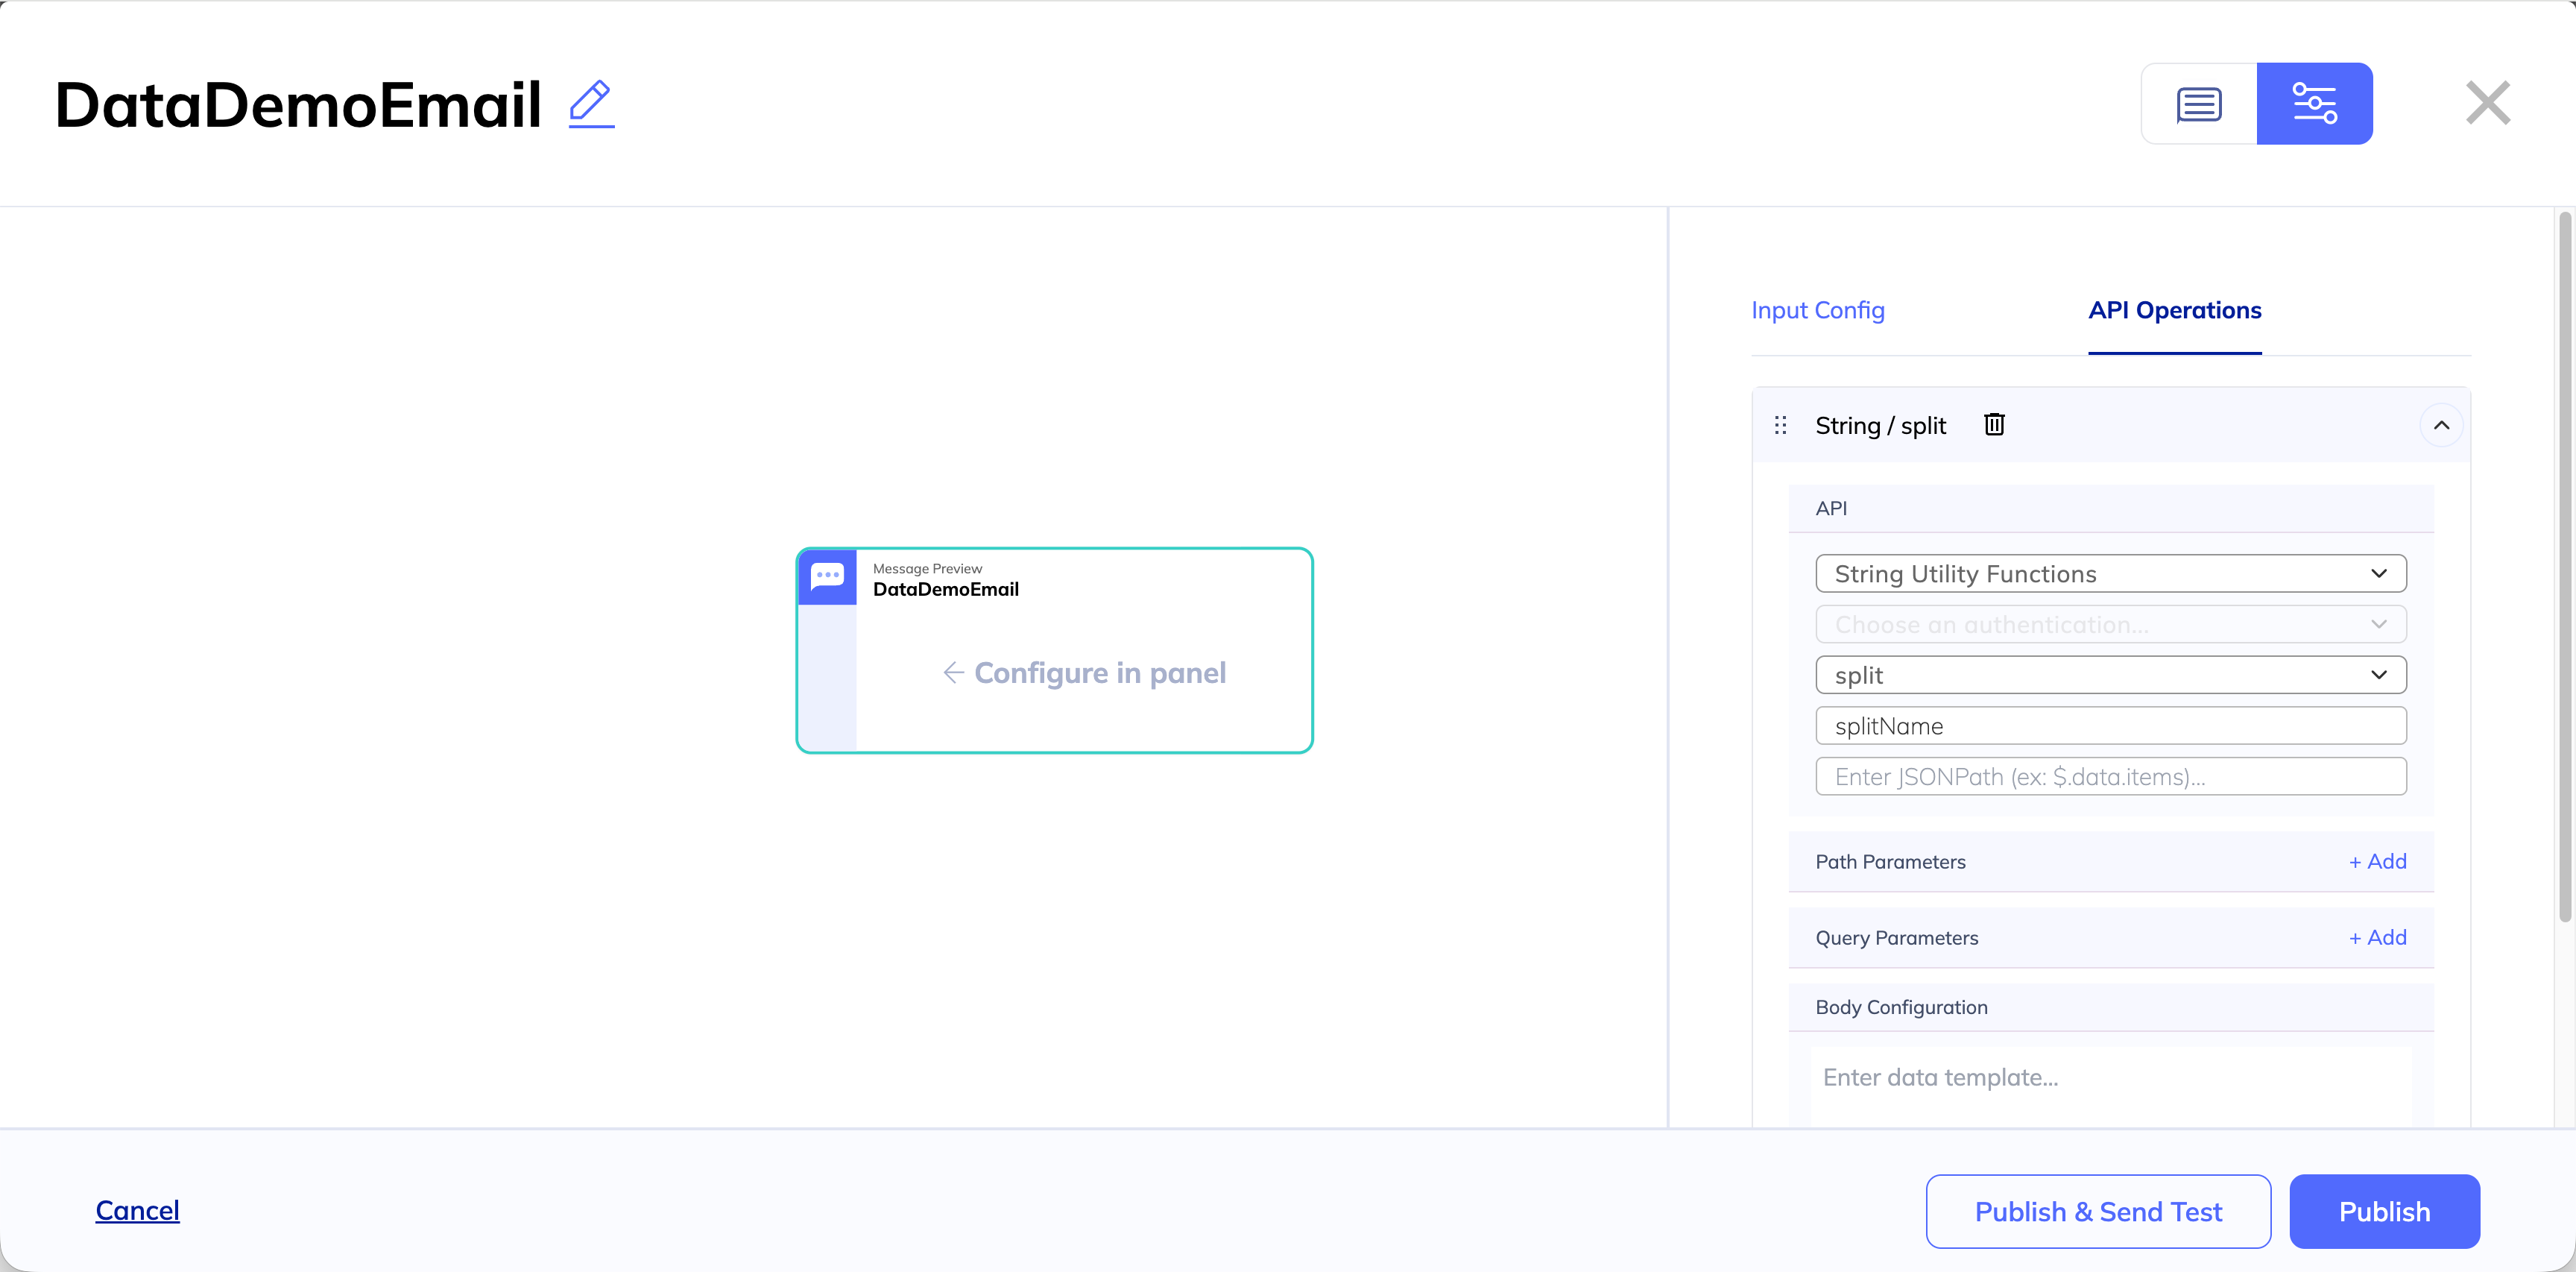
Next configure the body of the API call. In this case, we are sending the text by using a token that references the data we collected in the previous step. The split function will transform the data from the single field into an array of strings, looking for a space as a delimiter. The body of the call should look like this:
{"text":"{{context.fullName}}","delimiter":" "} Now, we can add the first name to our message. Return to the RCS configuration panel using the toggle at the top righthand corner.
In the text of your message, add the token {{ context.data.splitName.result[0] }} where you would like to return the first result of this function, which should be the user’s first name.
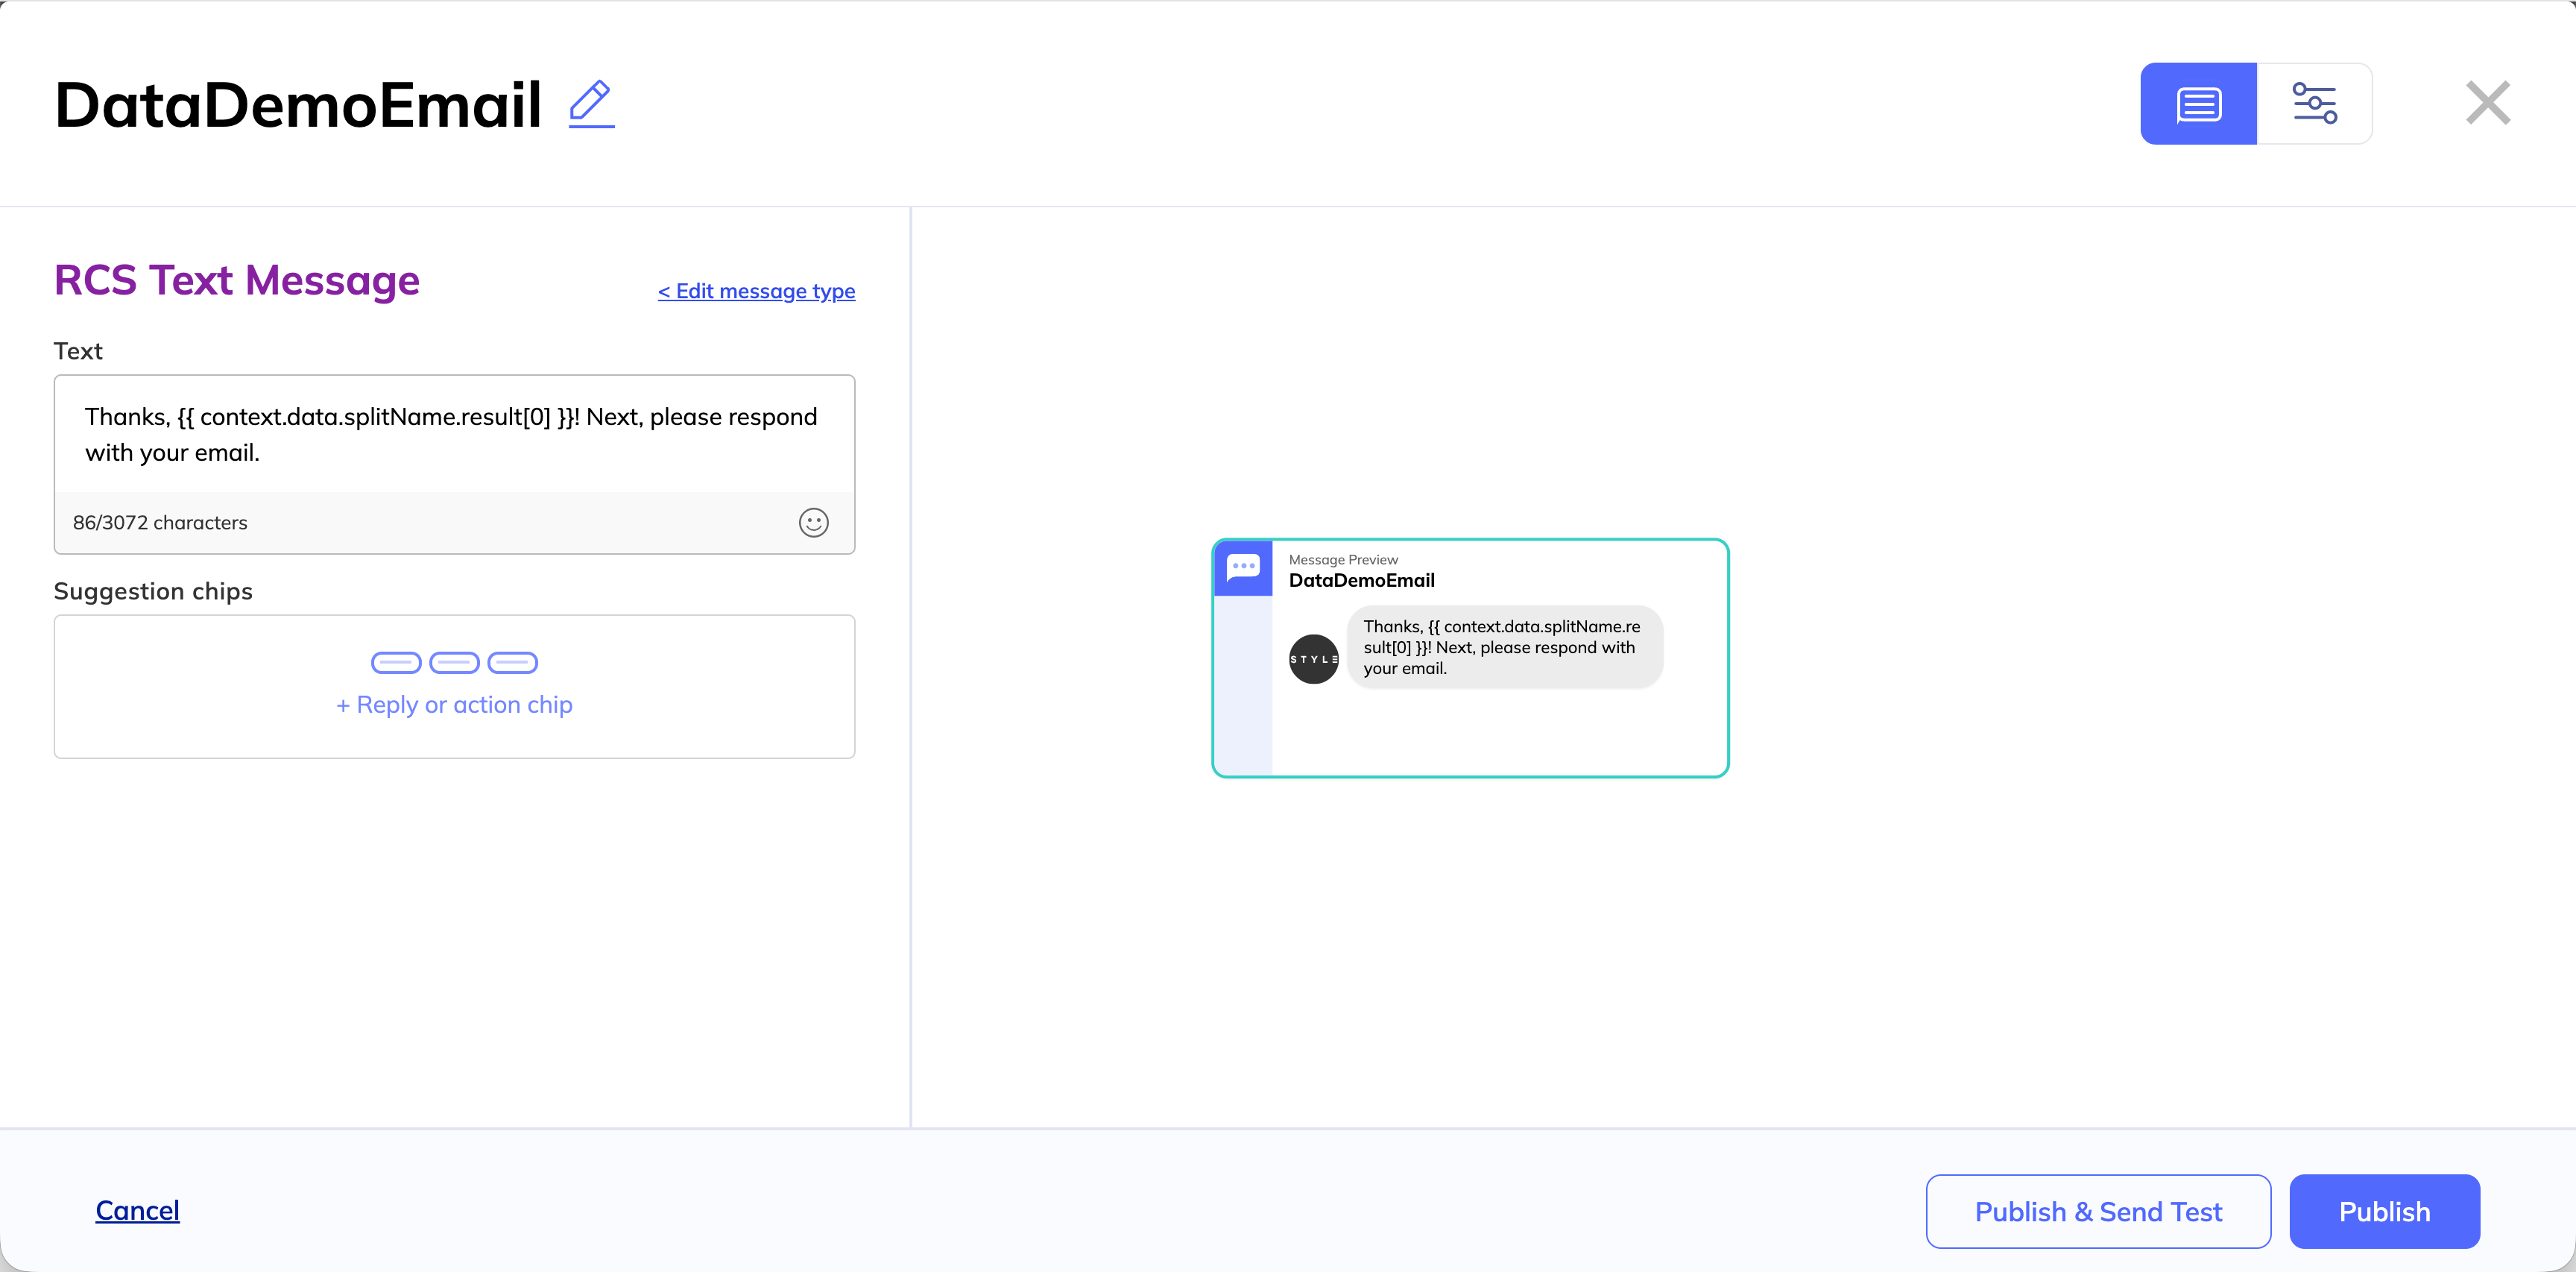
For example, we’ll write:
Thanks,
{{ context.data.splitName.result[0] }}! Next, please respond with your email.
Step 3: Collect email.
Now, we’ll perform the same actions as in Step 1 to inform the system to store the user’s input as data.
Remember, to do so, we’ll go to Input config and add an assignment. After naming our Next State DemoFinalConfirmation, we add currentMessage.text in From and map to a field we’ll call userEmail.

Publish your message.
Step 4: Confirm your data collection.
In your final message, you’ll want to confirm that the data has been collected by letting your customer review the data from their messages.
Create a new message and give it the name you entered in Next State in the step above. We named ours DemoFinalConfirmation, so we’ll do that here.
In our message, we use tokens that reference the context of the conversation. Any time we want to reference data we’ve collected previously in the conversation, we can use the token {{ context.[FIELDNAME] }}.
Here’s what our message will say.
Thanks! Here’s what we’ve learned:
Name:
{{ context.fullName }}Email:
{{ context.userEmail }}Have a great day!
Publish your message.
Step 5: Try it yourself!
Once you’ve built out your RCS journey, it’s always best practice to send yourself a test message. Assuming you’ve added yourself as a tester, you can return to your first message and send yourself a test message using the Publish & send test button.
Updated 8 months ago